Photography · Hardware · DIY
Infrared photography & full-spectrum camera mods
A low-stakes but very hands-on side project in computational curiosity—modifying old consumer cameras for near-infrared, experimenting with optics and post-processing, and learning by taking apart hardware cheap enough to risk but good enough to teach something meaningful.
- Origin
- Spring 2020 lockdown project
- Platforms
- LG G3 smartphone → Sony Cyber-shot DSC-H20
- Focus
- Near-infrared photography, sensor modification, optics hacks, image processing
- What it shows
- Curiosity, comfort with hardware, willingness to experiment, and learning by building
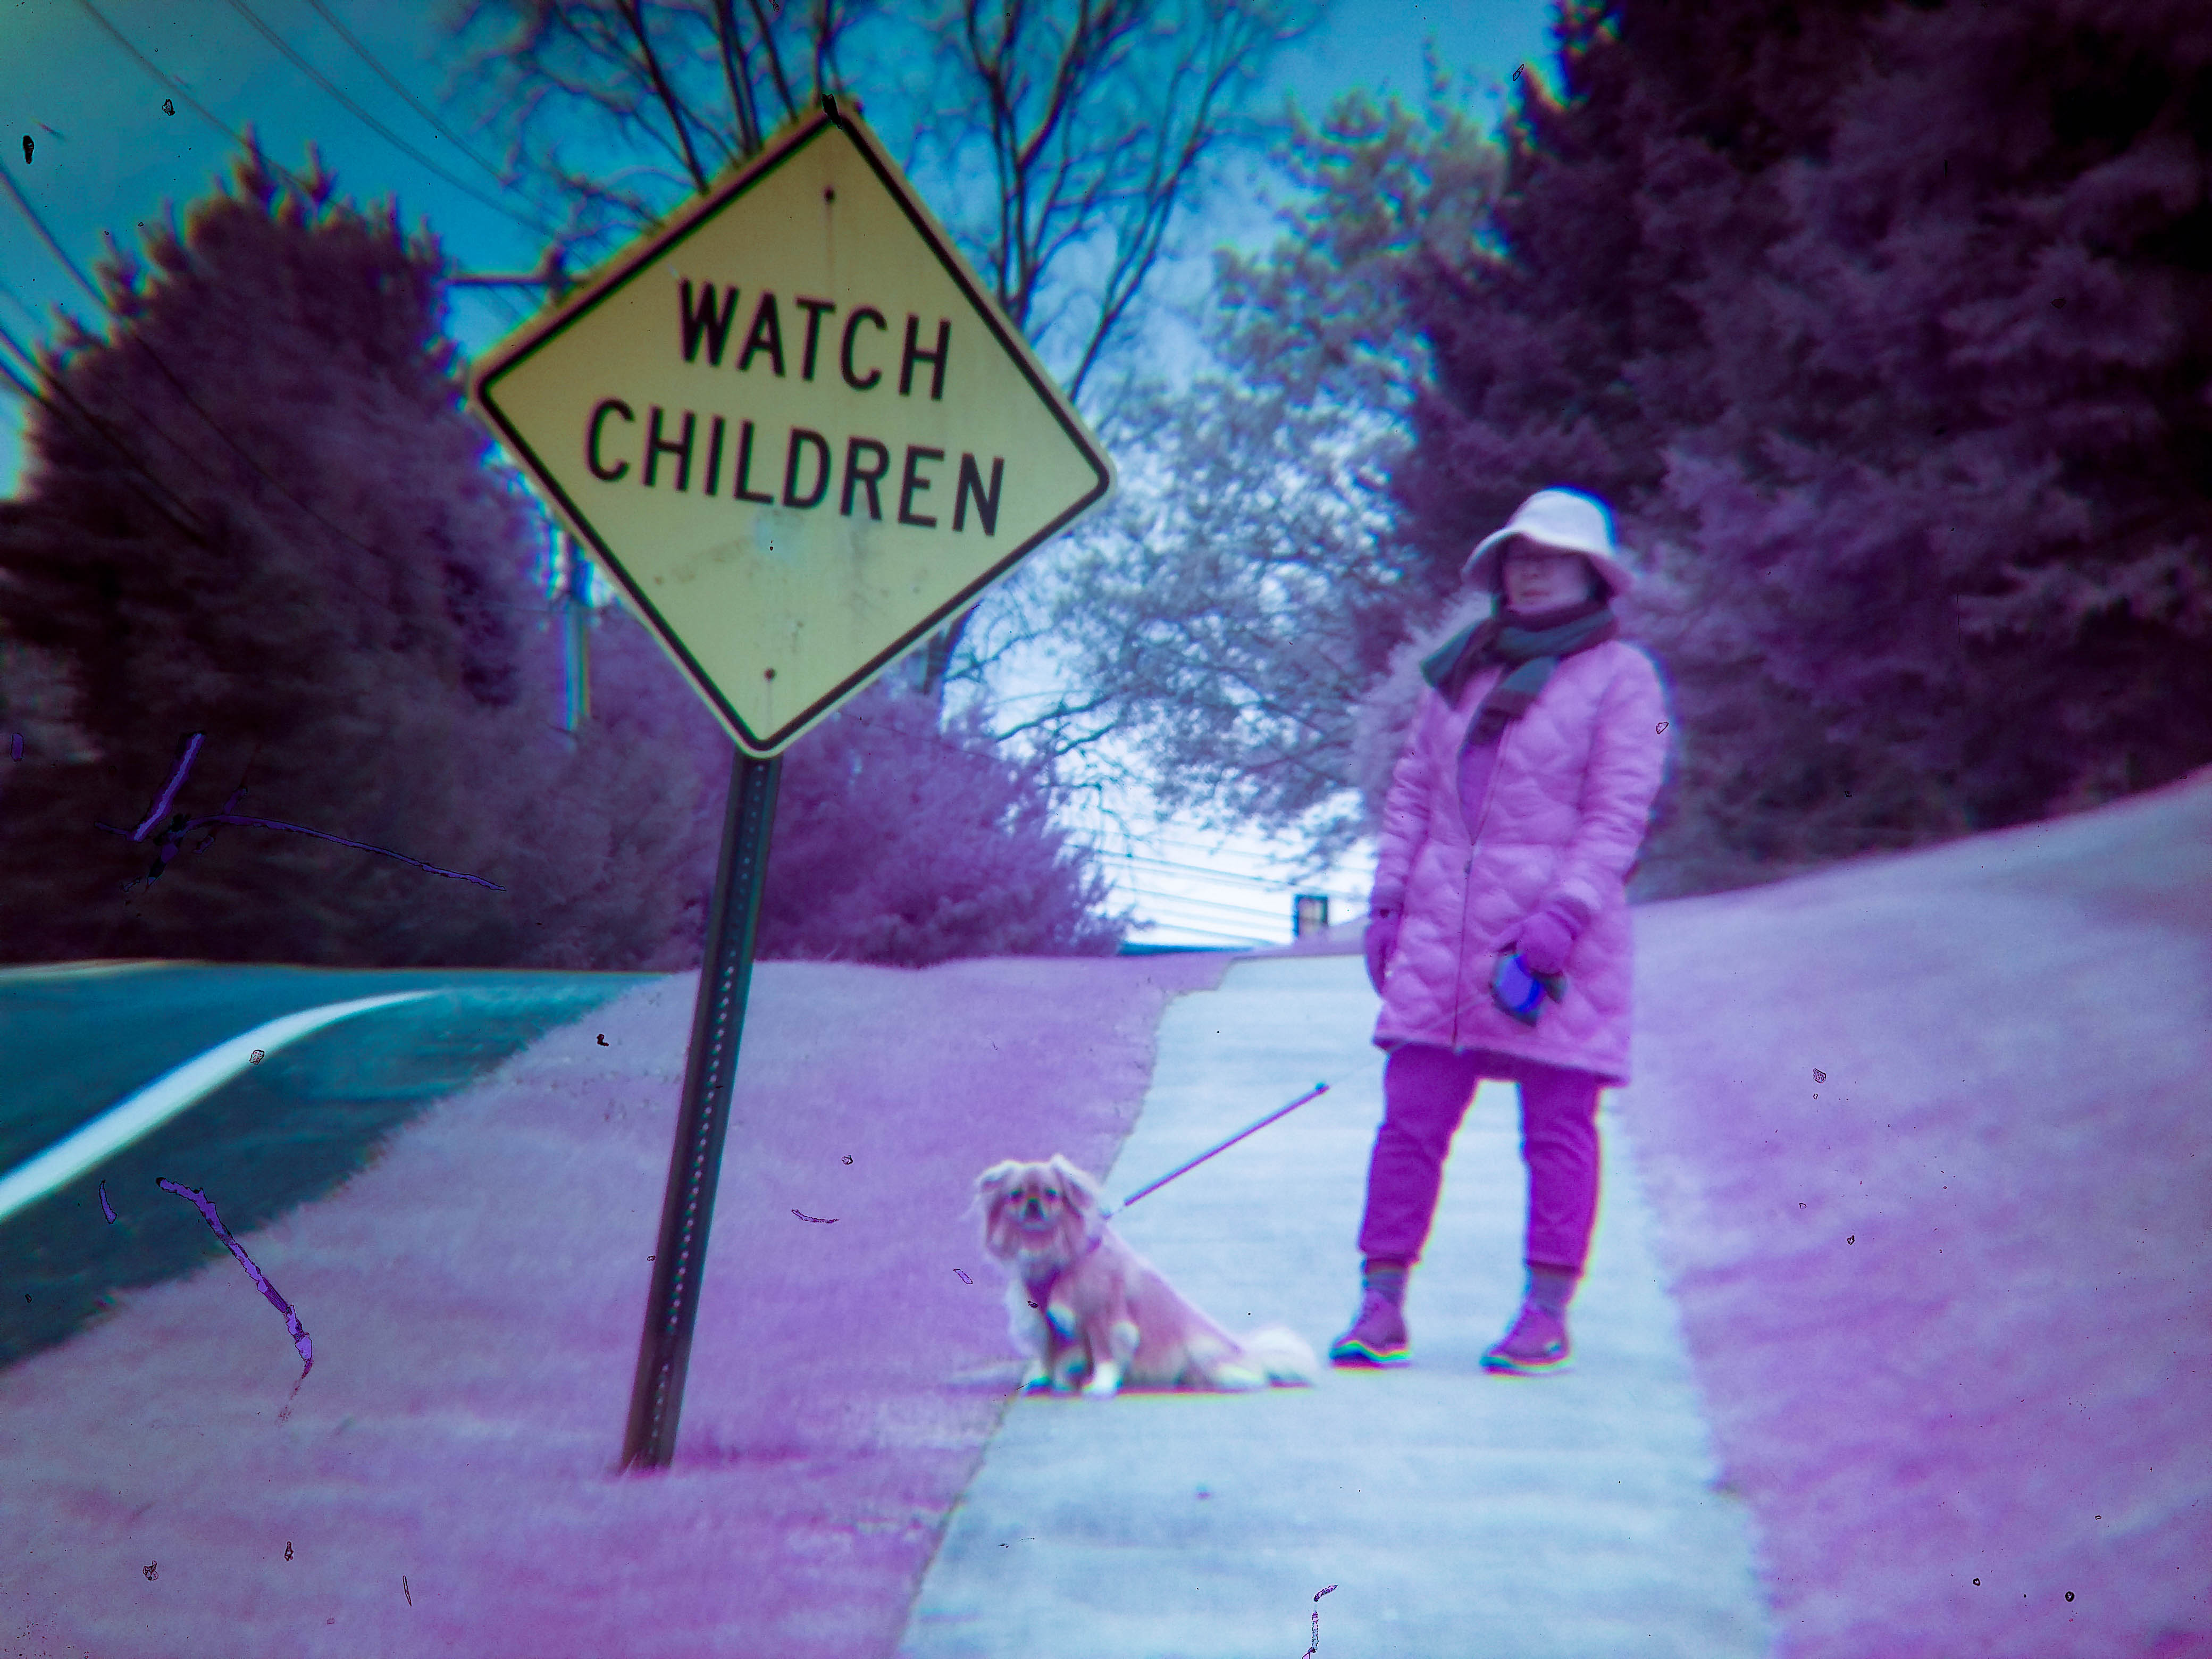
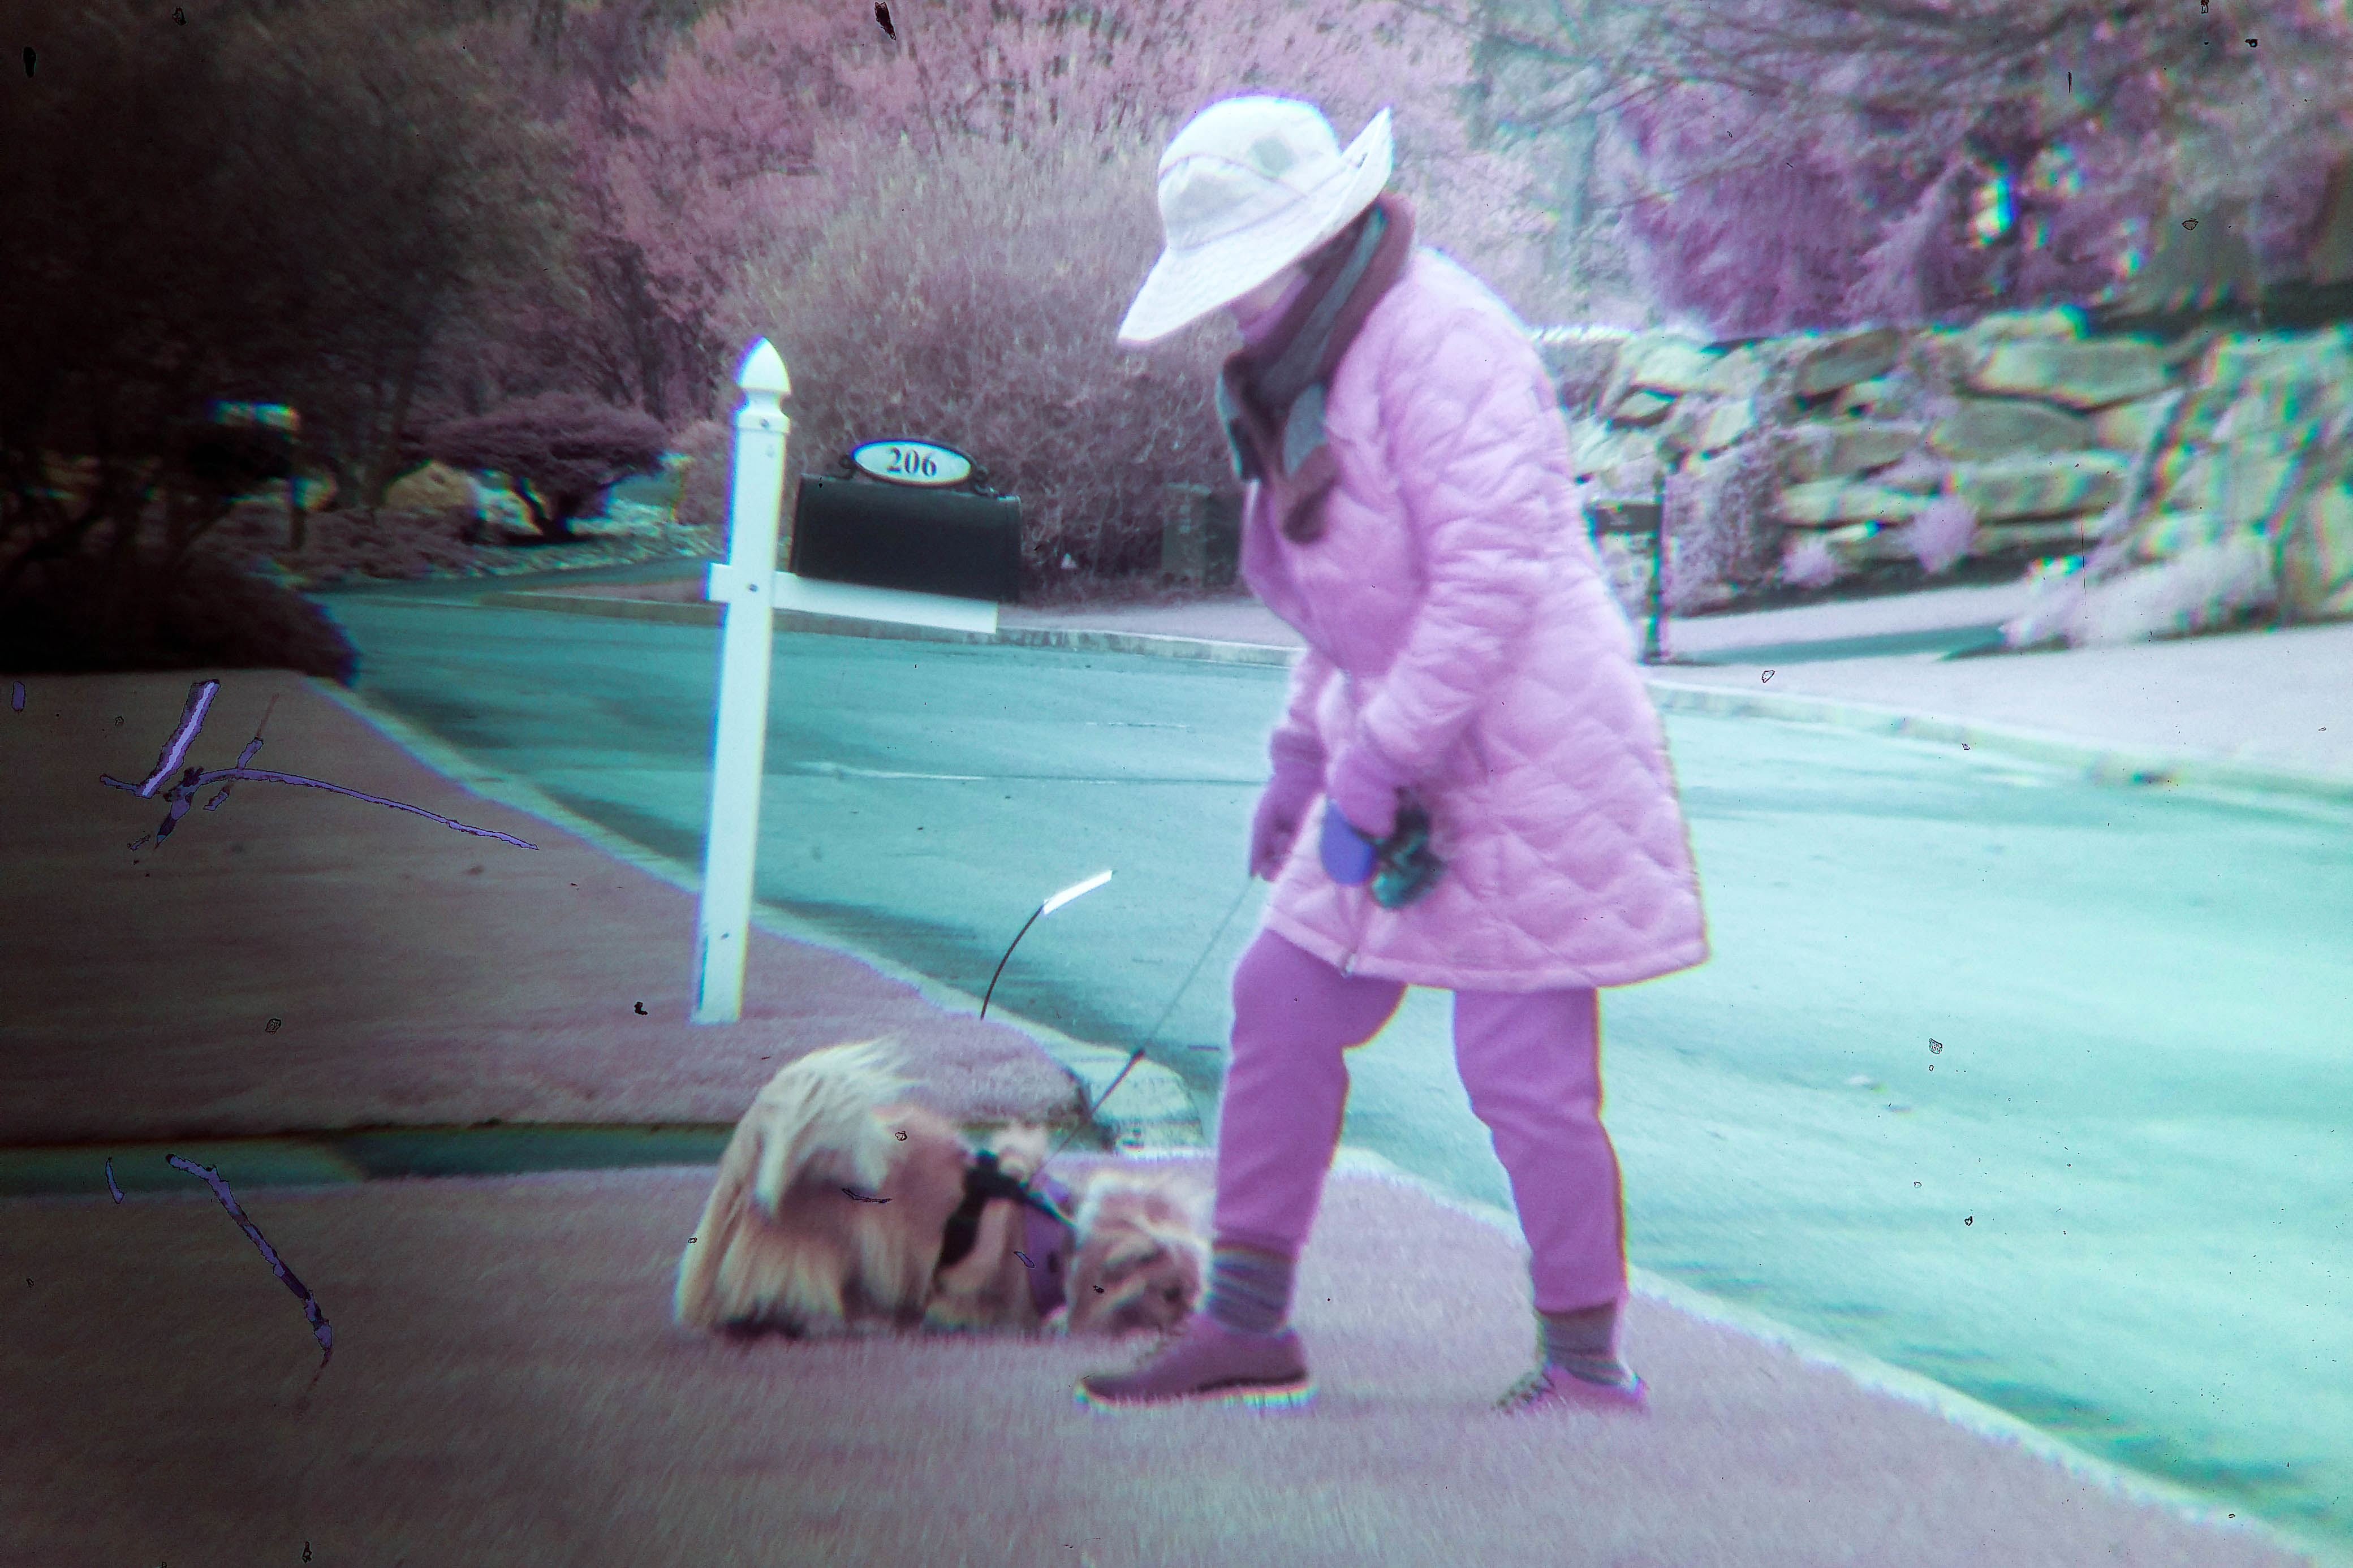
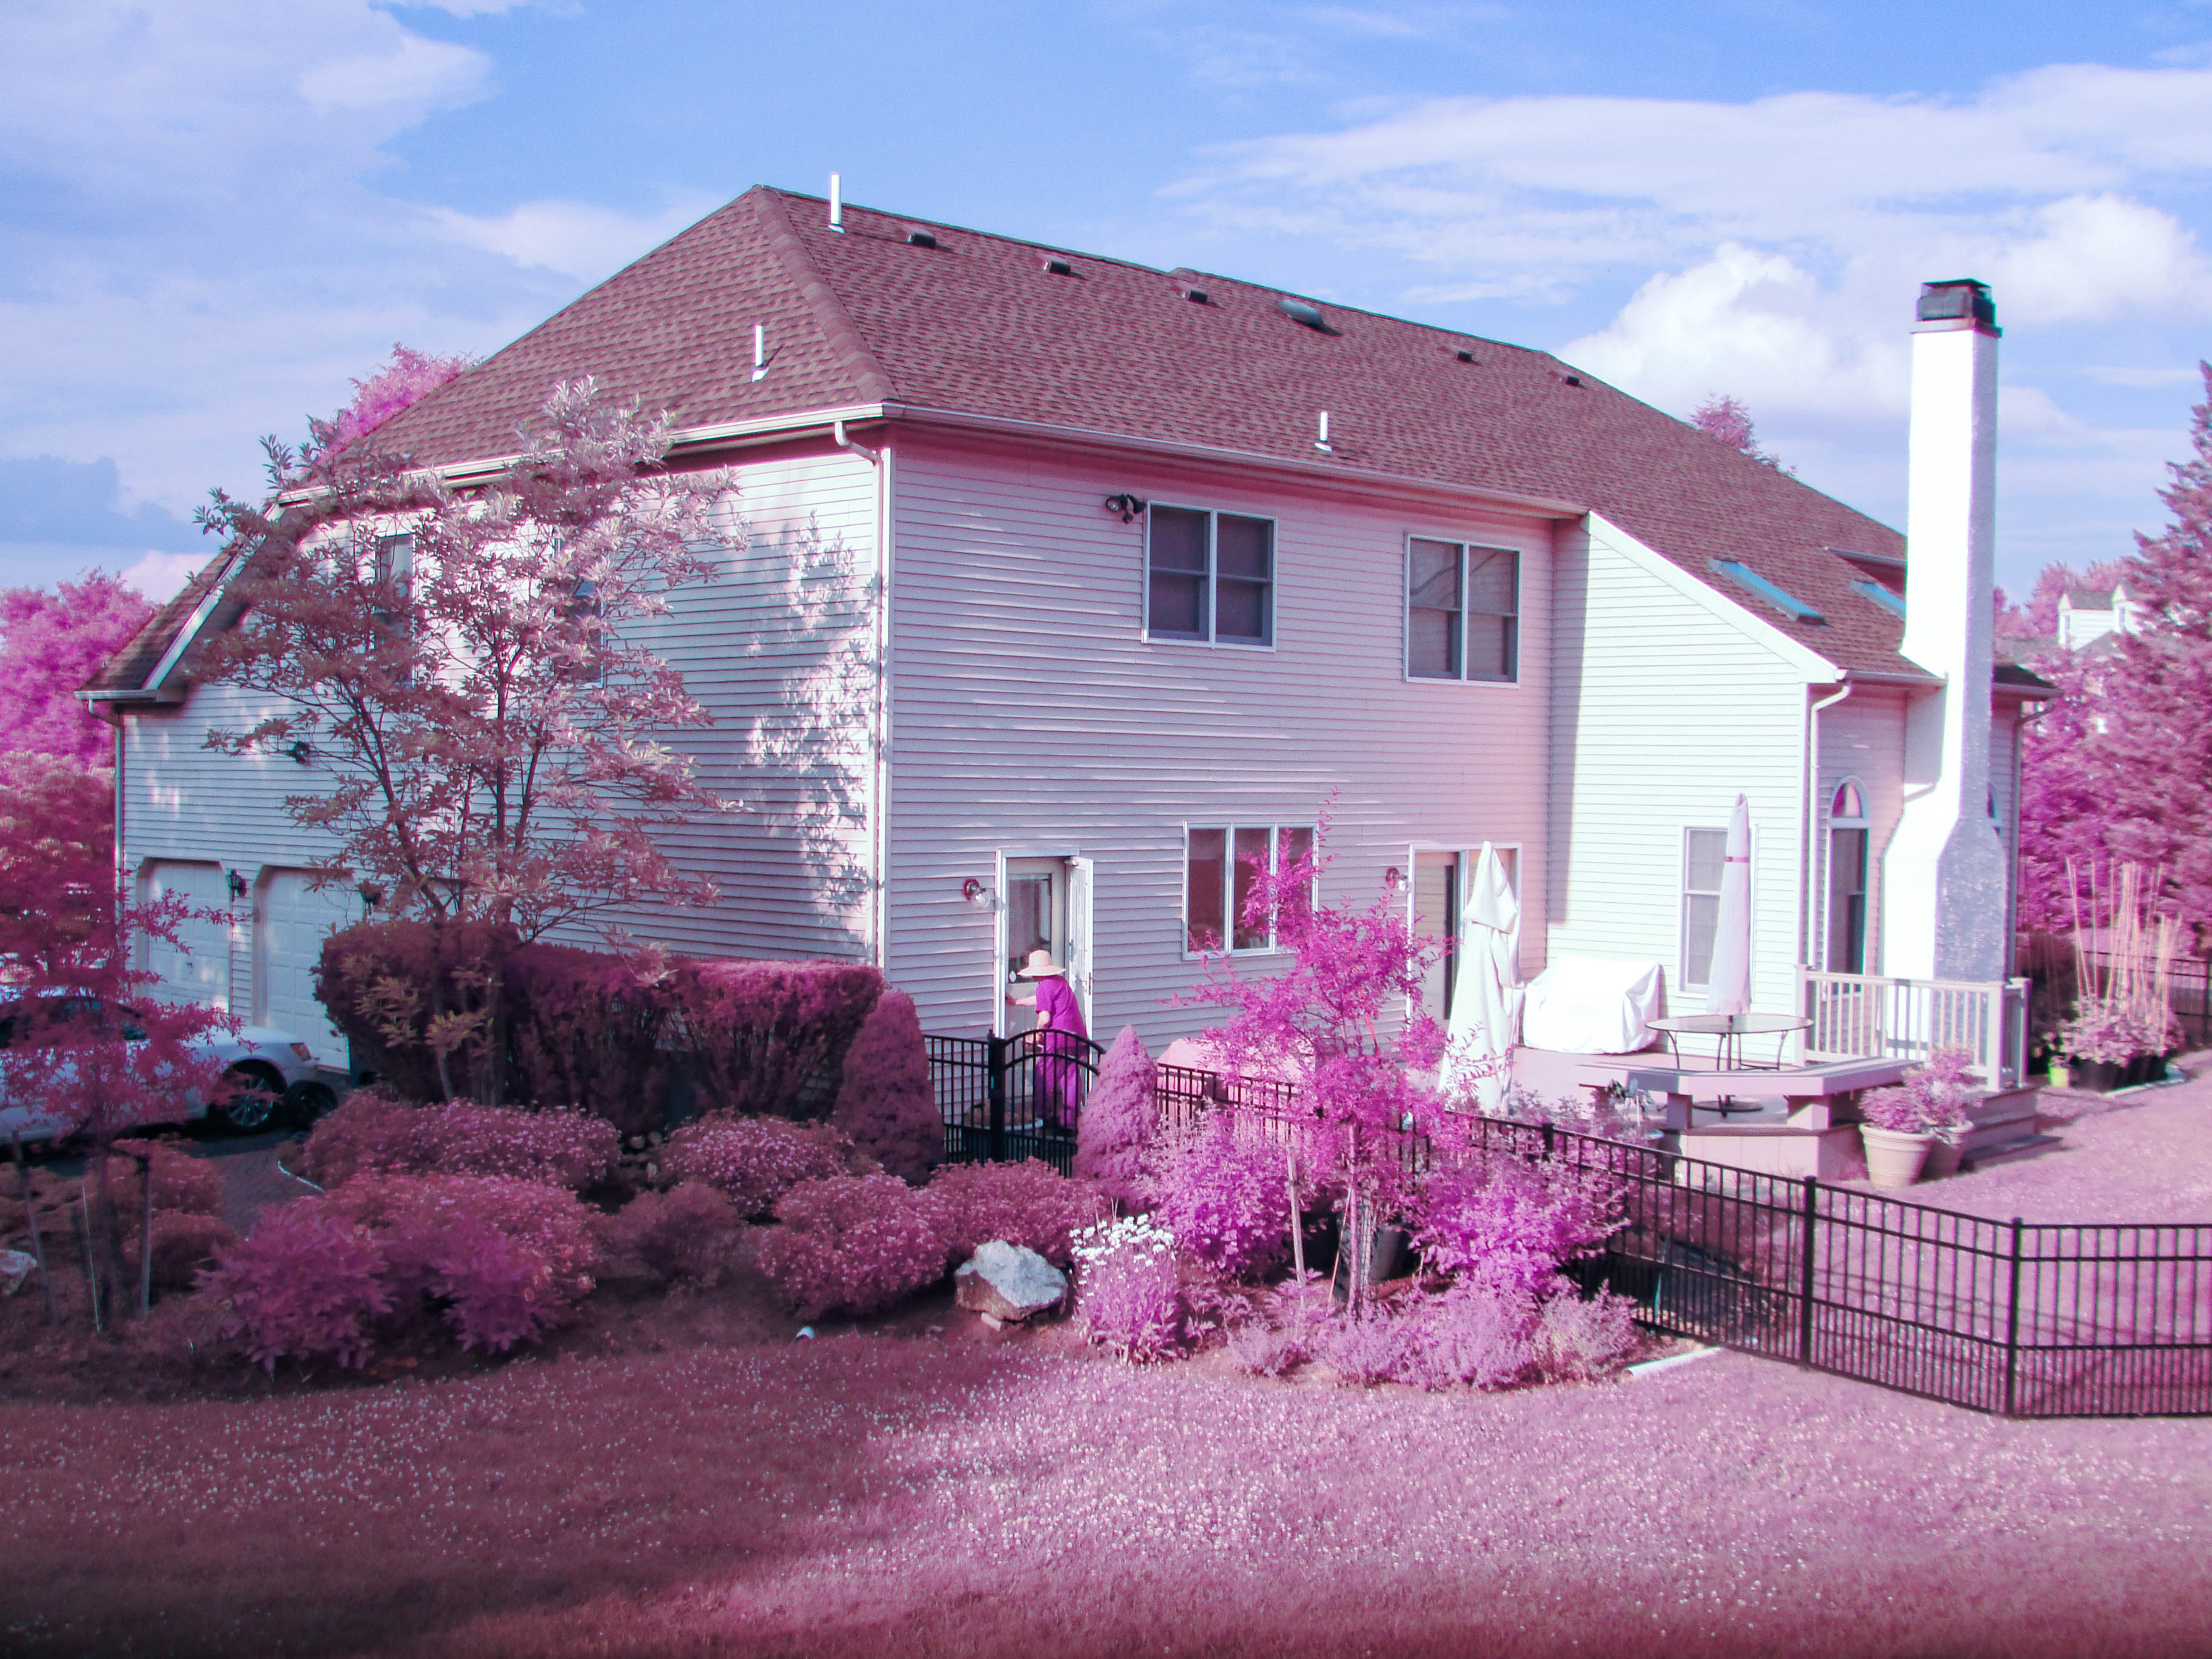
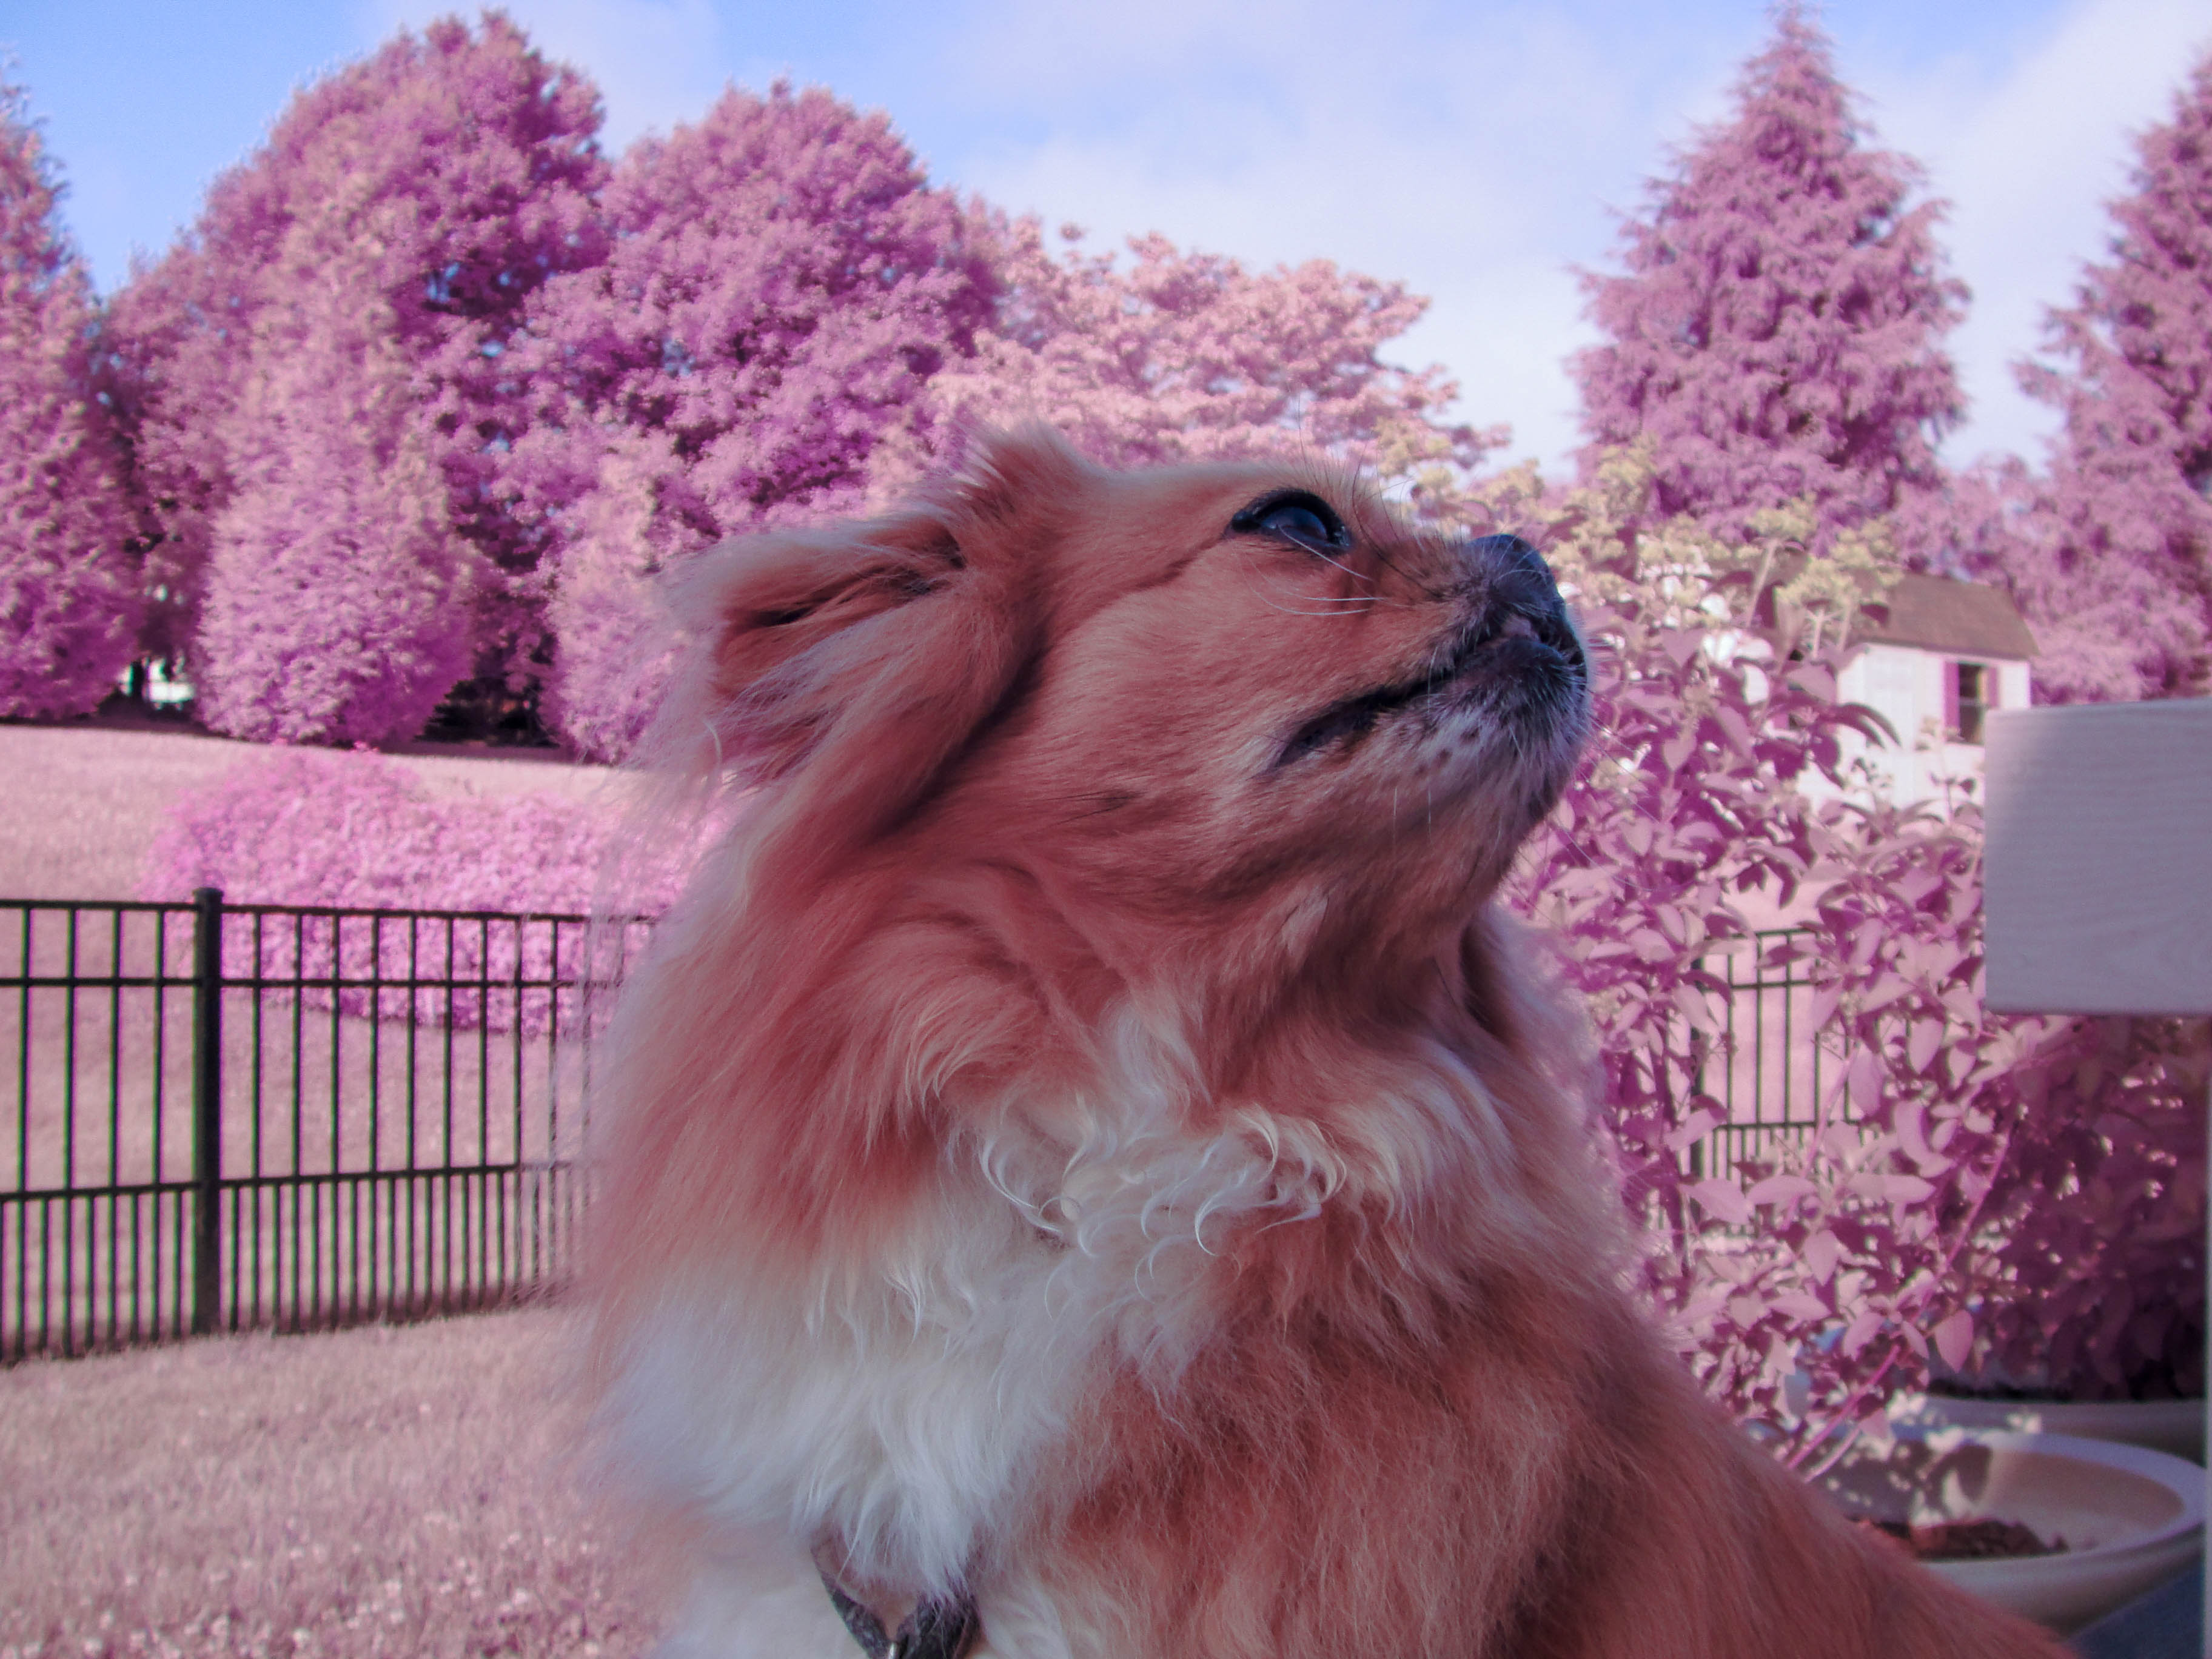
IR sample: my mom and François.
Why this project is on my portfolio
This is not my most important technical project, but it is a good example of how I like to work: I get curious about how something works, break it apart, test ideas quickly, tolerate imperfect setups, and iterate until I get something interesting. In this case, that meant turning obsolete cameras into near-infrared imaging tools and figuring out the optics, mechanics, and editing pipeline along the way.
During the early 2020 lockdown period I found myself returning to old hobbies: digging out an SLR, digitizing Video8 home movies, and experimenting with analog video feedback using a camcorder and CRT. Infrared photography became one of those tangents—part image-making exercise, part hardware teardown, part methods project.
What infrared photography is
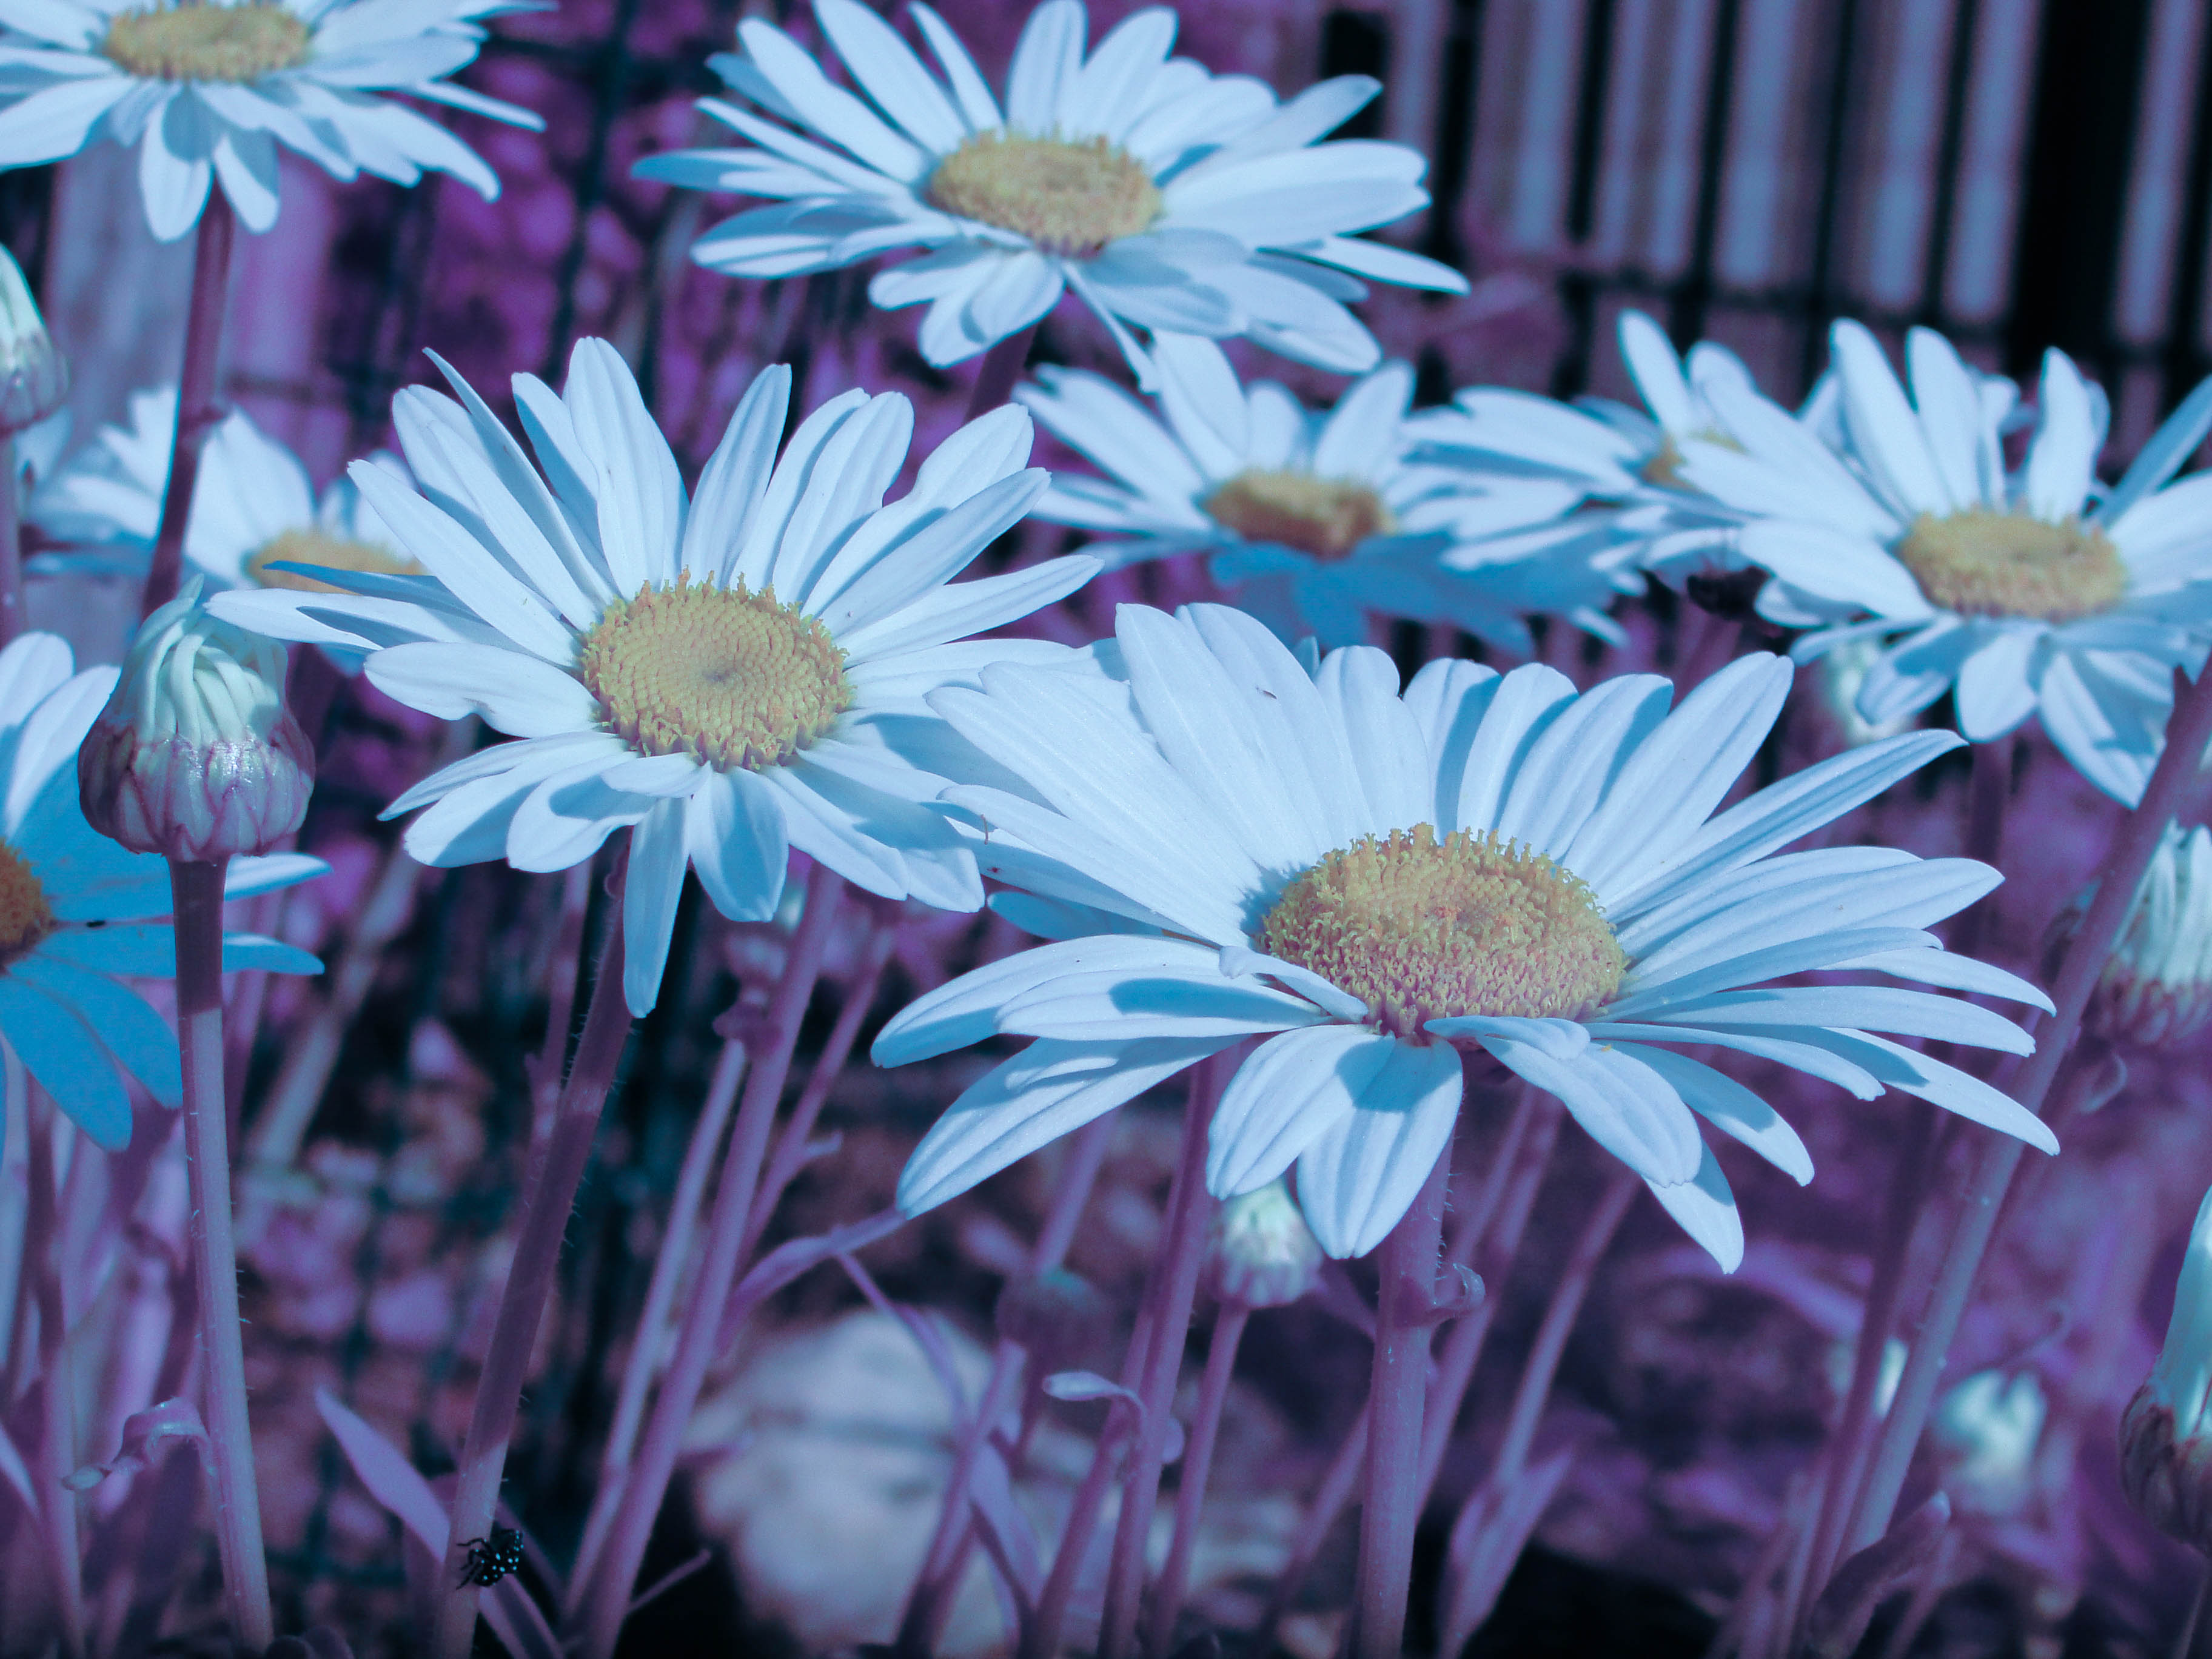
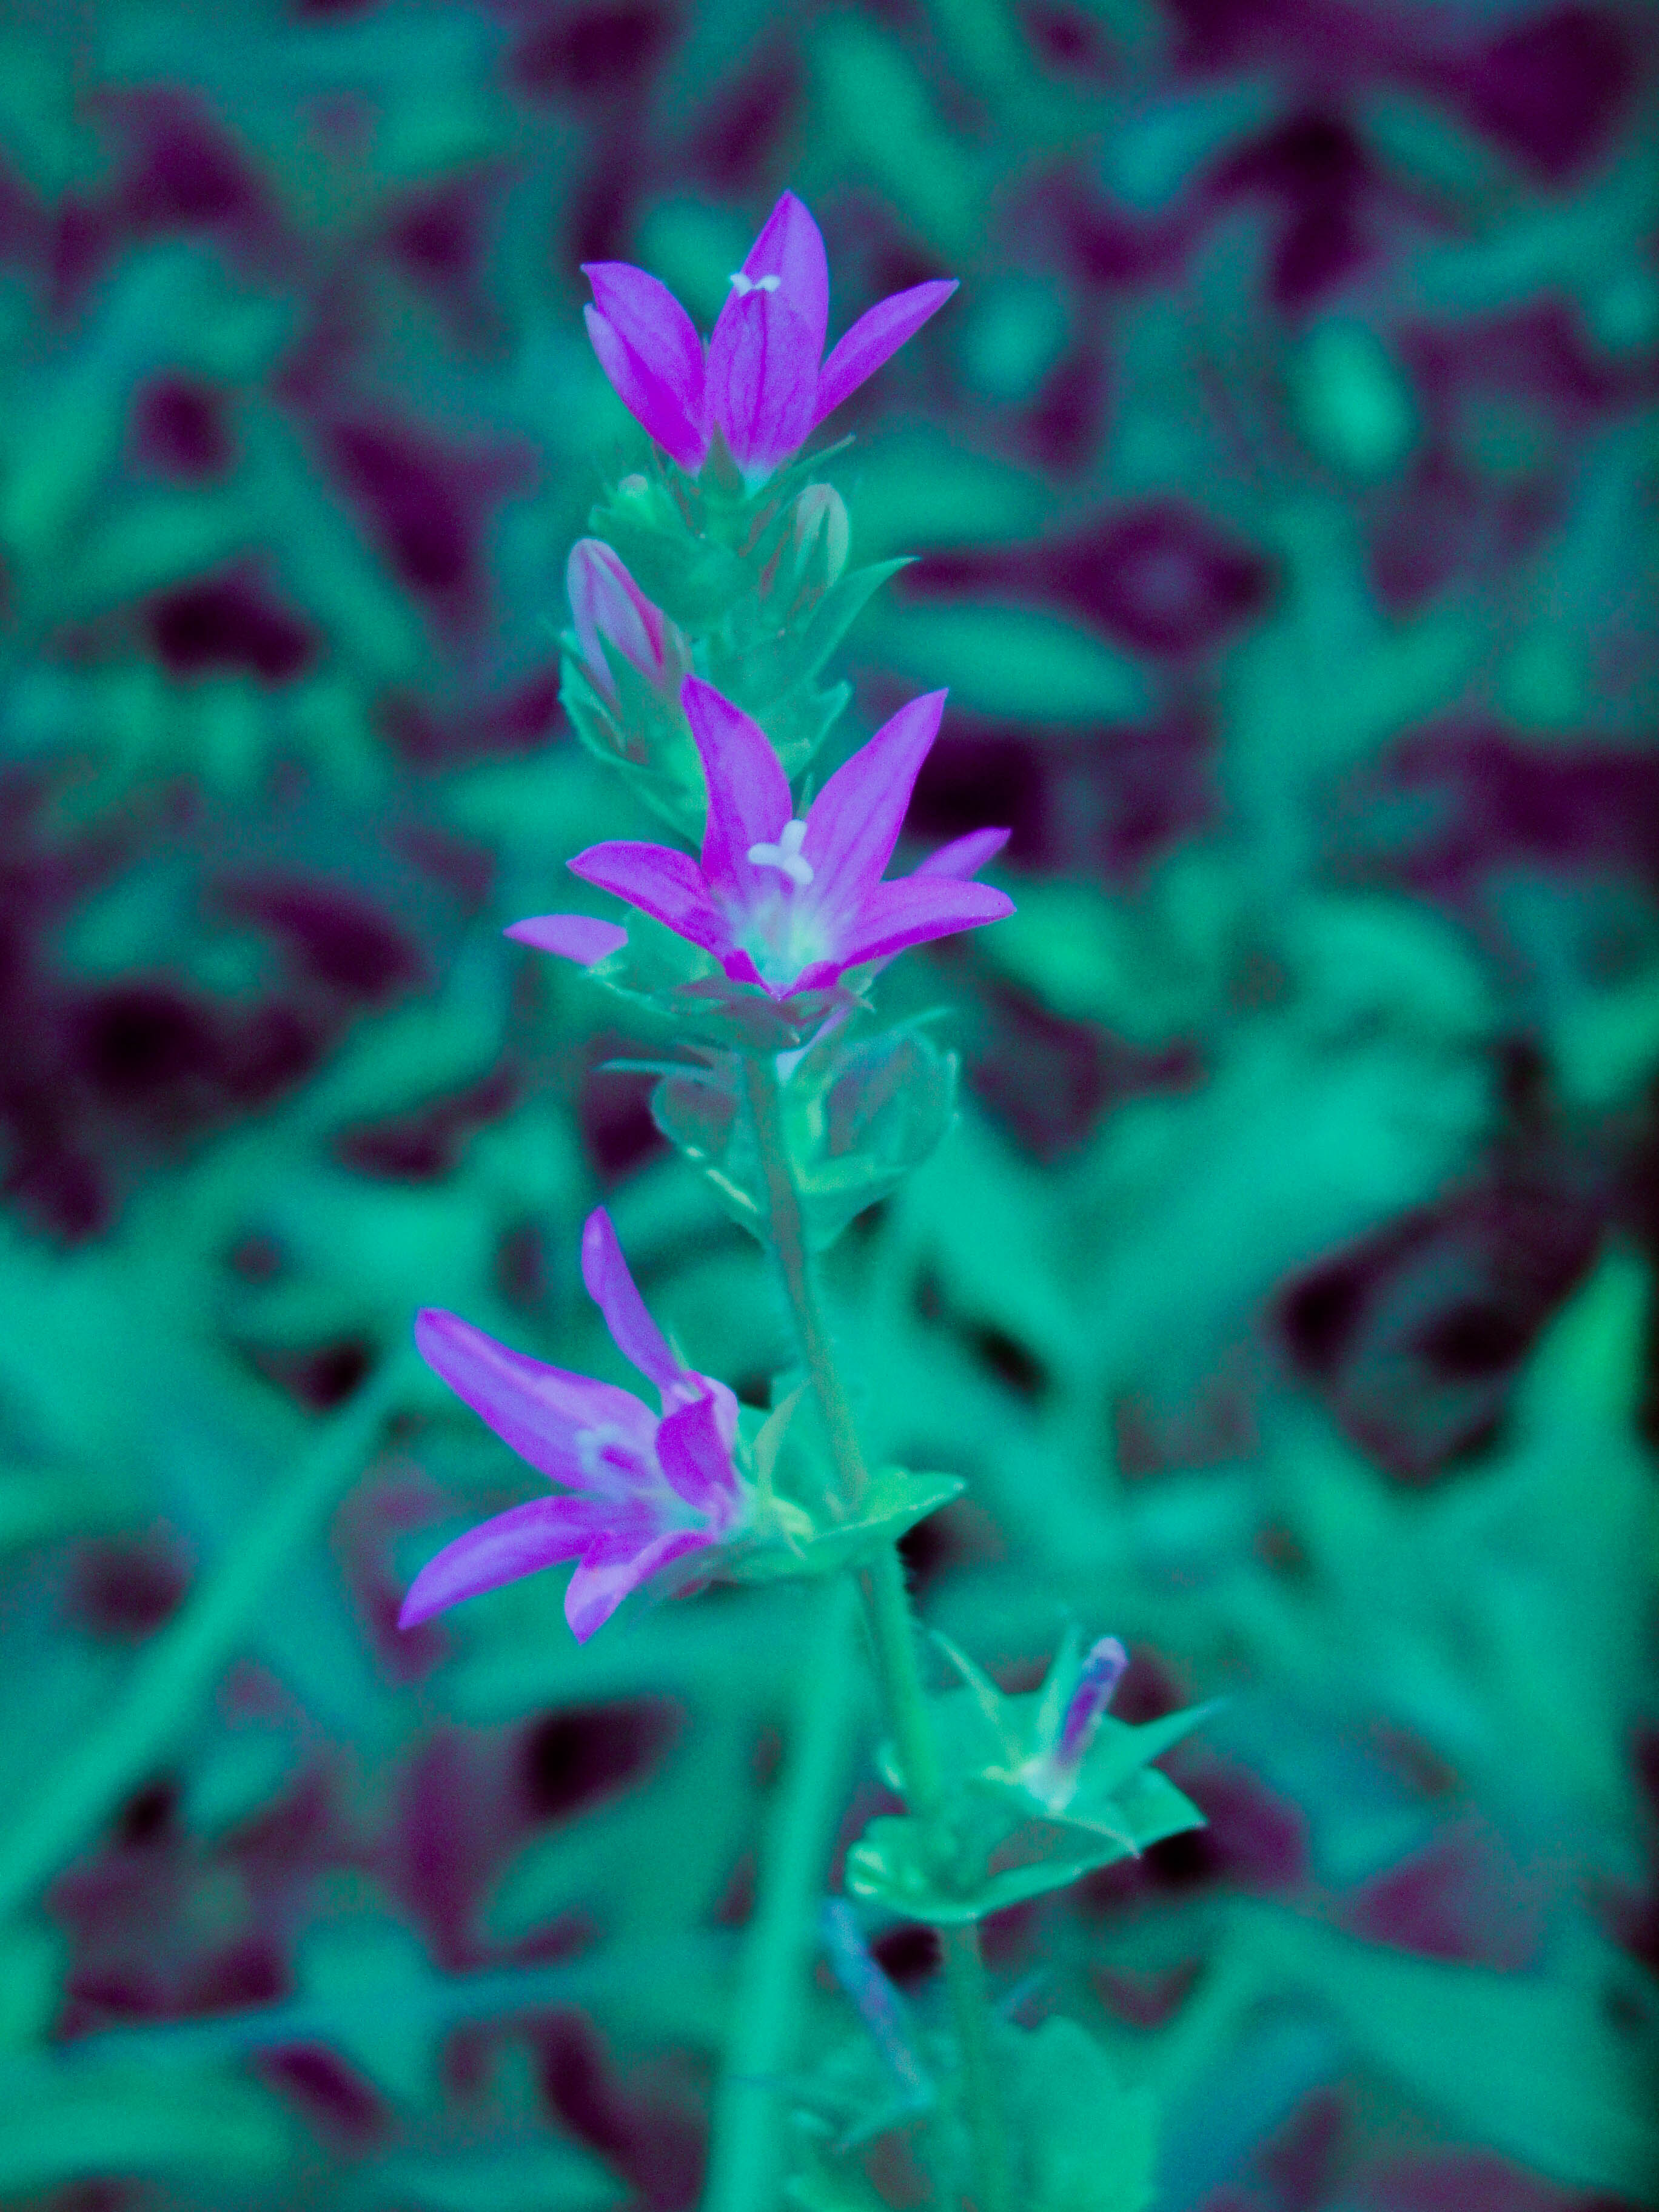
Digital camera sensors are naturally sensitive to some near-infrared light, but consumer cameras usually include an IR-cut filter so images better match human vision. Removing that filter allows near-IR light to reach the sensor, producing landscapes and foliage with an otherworldly look after processing.
This is not thermal or “heat vision.” Thermal imaging lives in the far-infrared range, which standard consumer camera sensors generally do not capture.
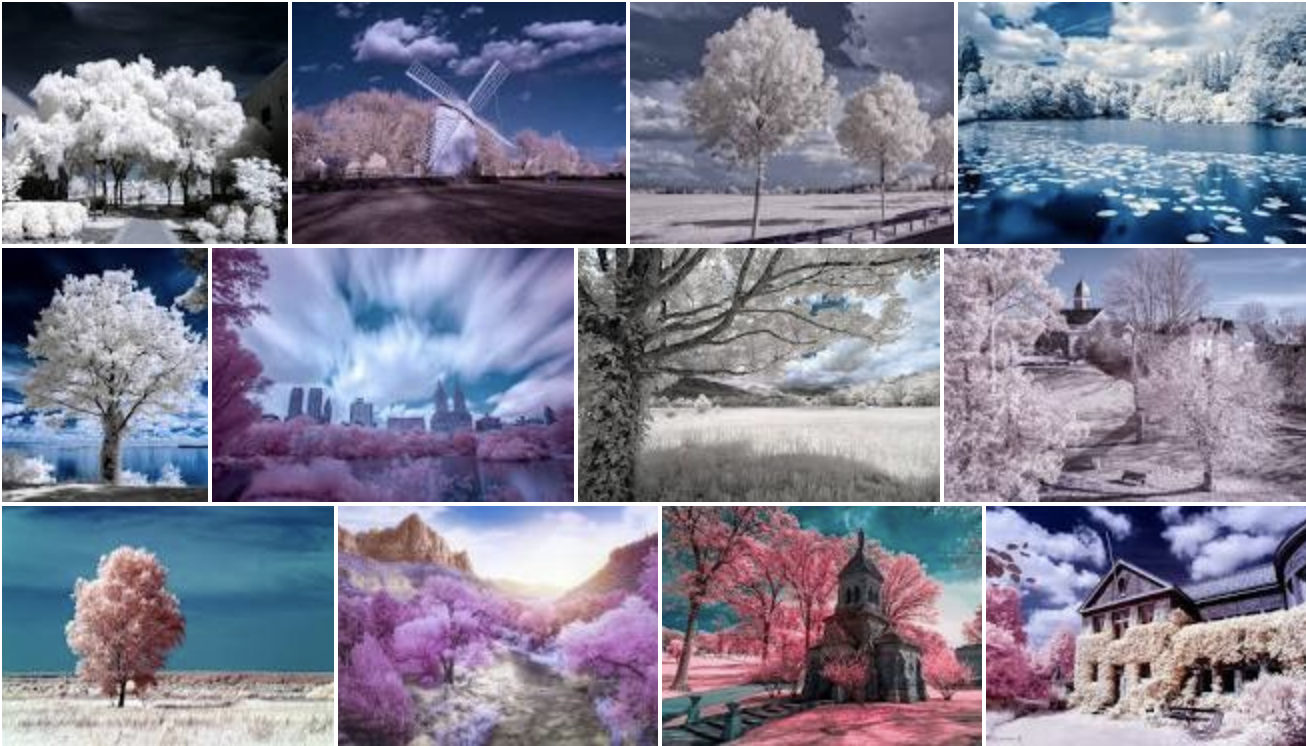
Reference frame: examples of infrared landscape photography.
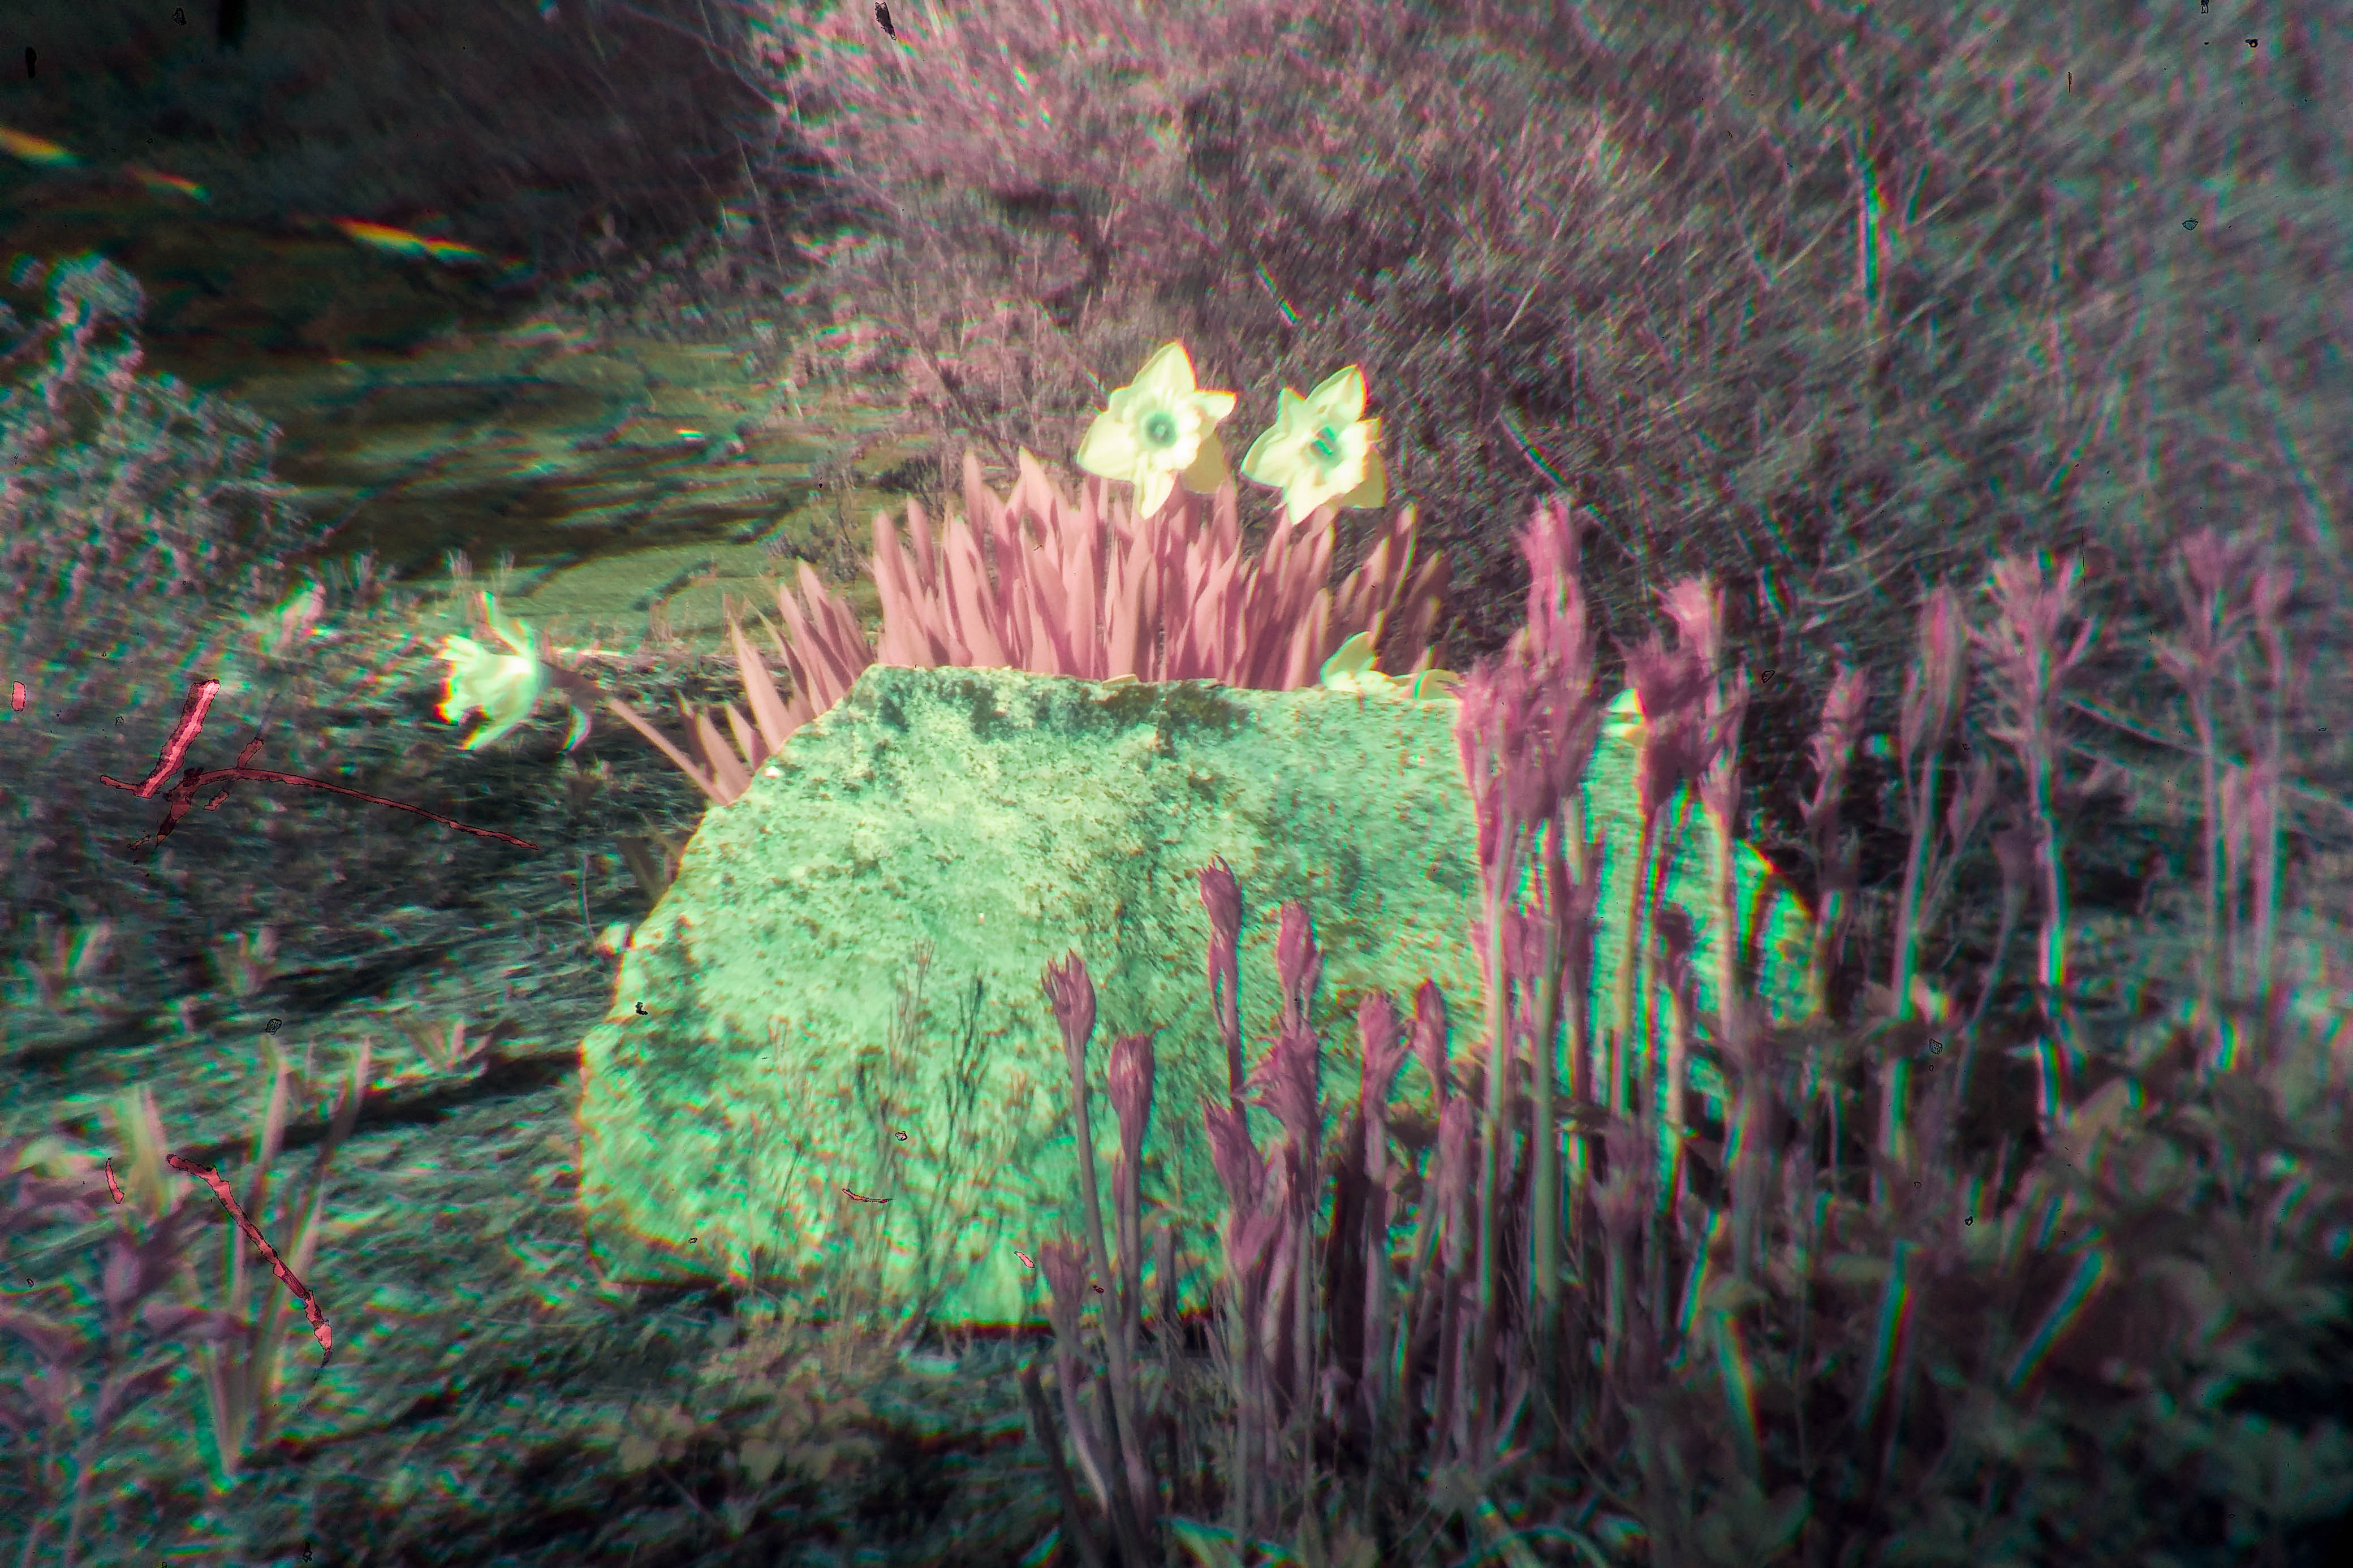
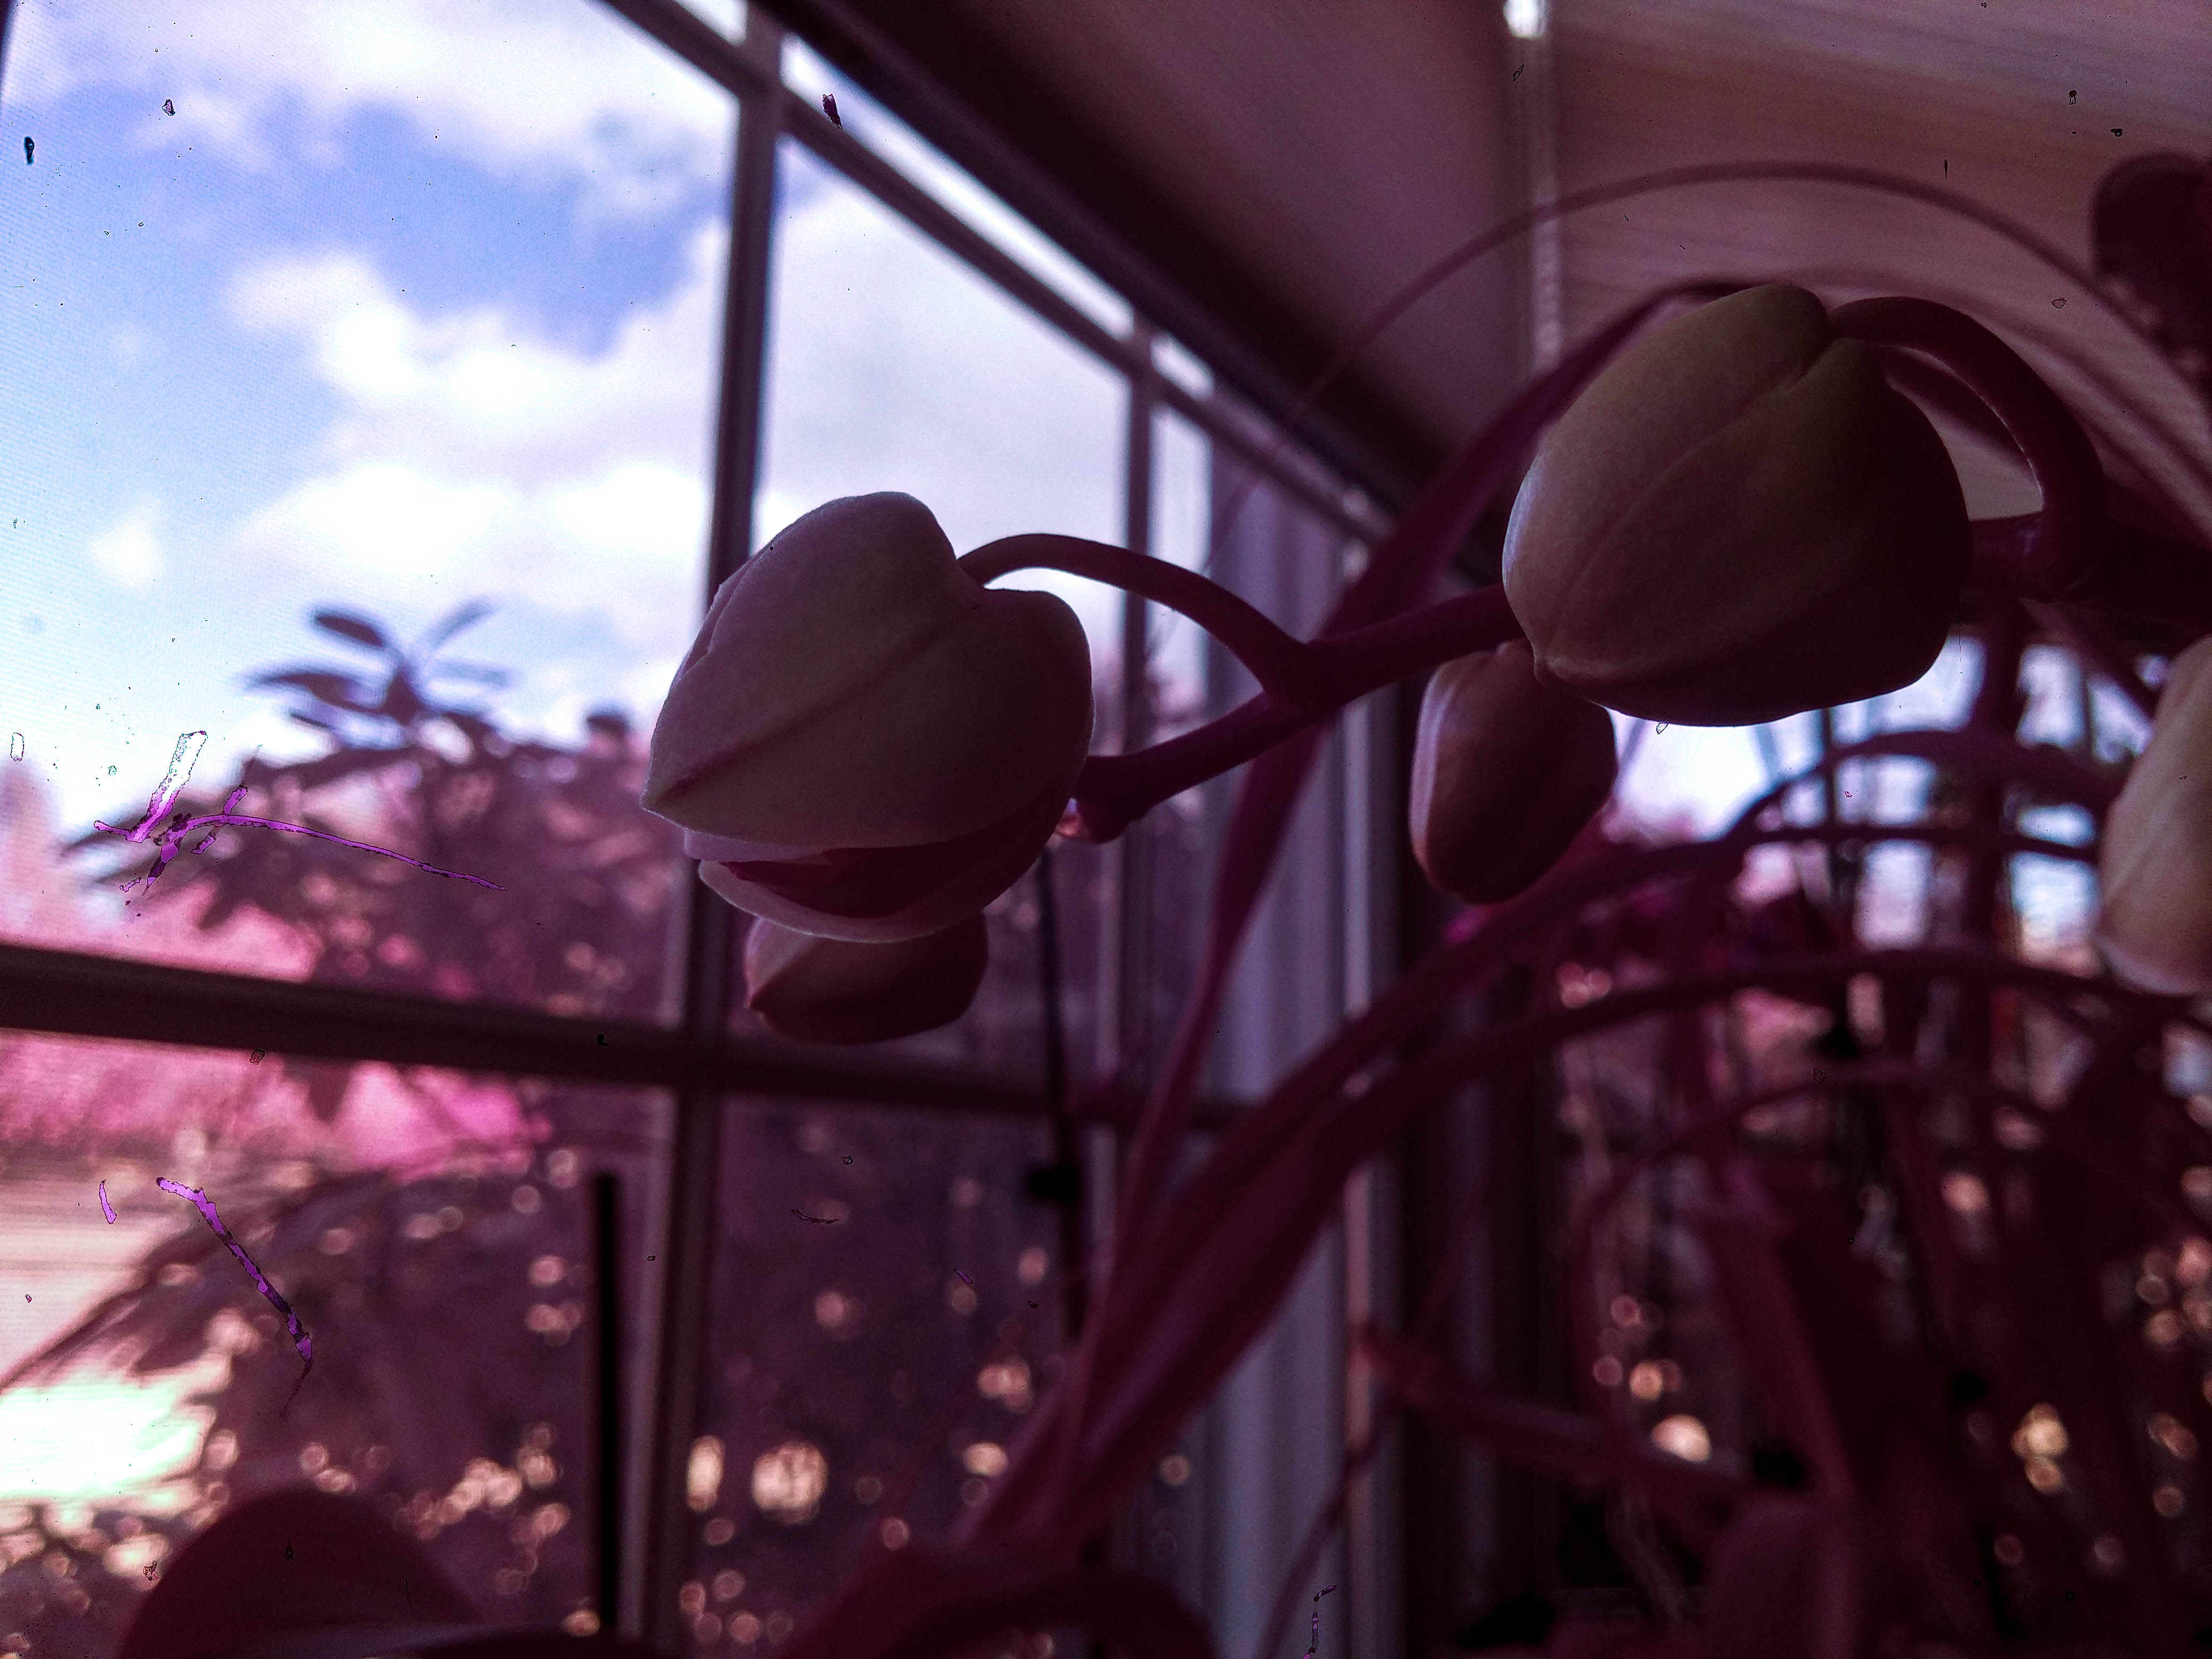
Green plants and grass can take on a bright pink or purple appearance depending on the processing pipeline:
Build 1: Modifying an LG G3
My first conversion target was an old LG G3 smartphone from 2014. It was expendable enough that I would not be upset if I destroyed it, but still had a decent camera module. It also had an IR autofocus system, which later turned into an unexpected bonus.
The plan was simple: disassemble the phone, remove the IR-cut filter in front of the sensor, put it back together, and see what happened.
In practice, it was messy. I was working with limited tools during lockdown, including a hair dryer standing in for a heat gun, and eventually removed the filter using an X-Acto knife and a bit too much force. I slightly scratched the sensor in the process. The resulting images had artifacts—not ideal, but visually interesting in their own way.
What changed after the mod
Once the filter was removed, the camera no longer focused normally and effectively became a macro-first system. That was fun for close-up shots, but I really wanted to shoot spring landscapes and foliage.
Macro infrared example.

Macro infrared shot with a diffraction grating for rainbow effects.
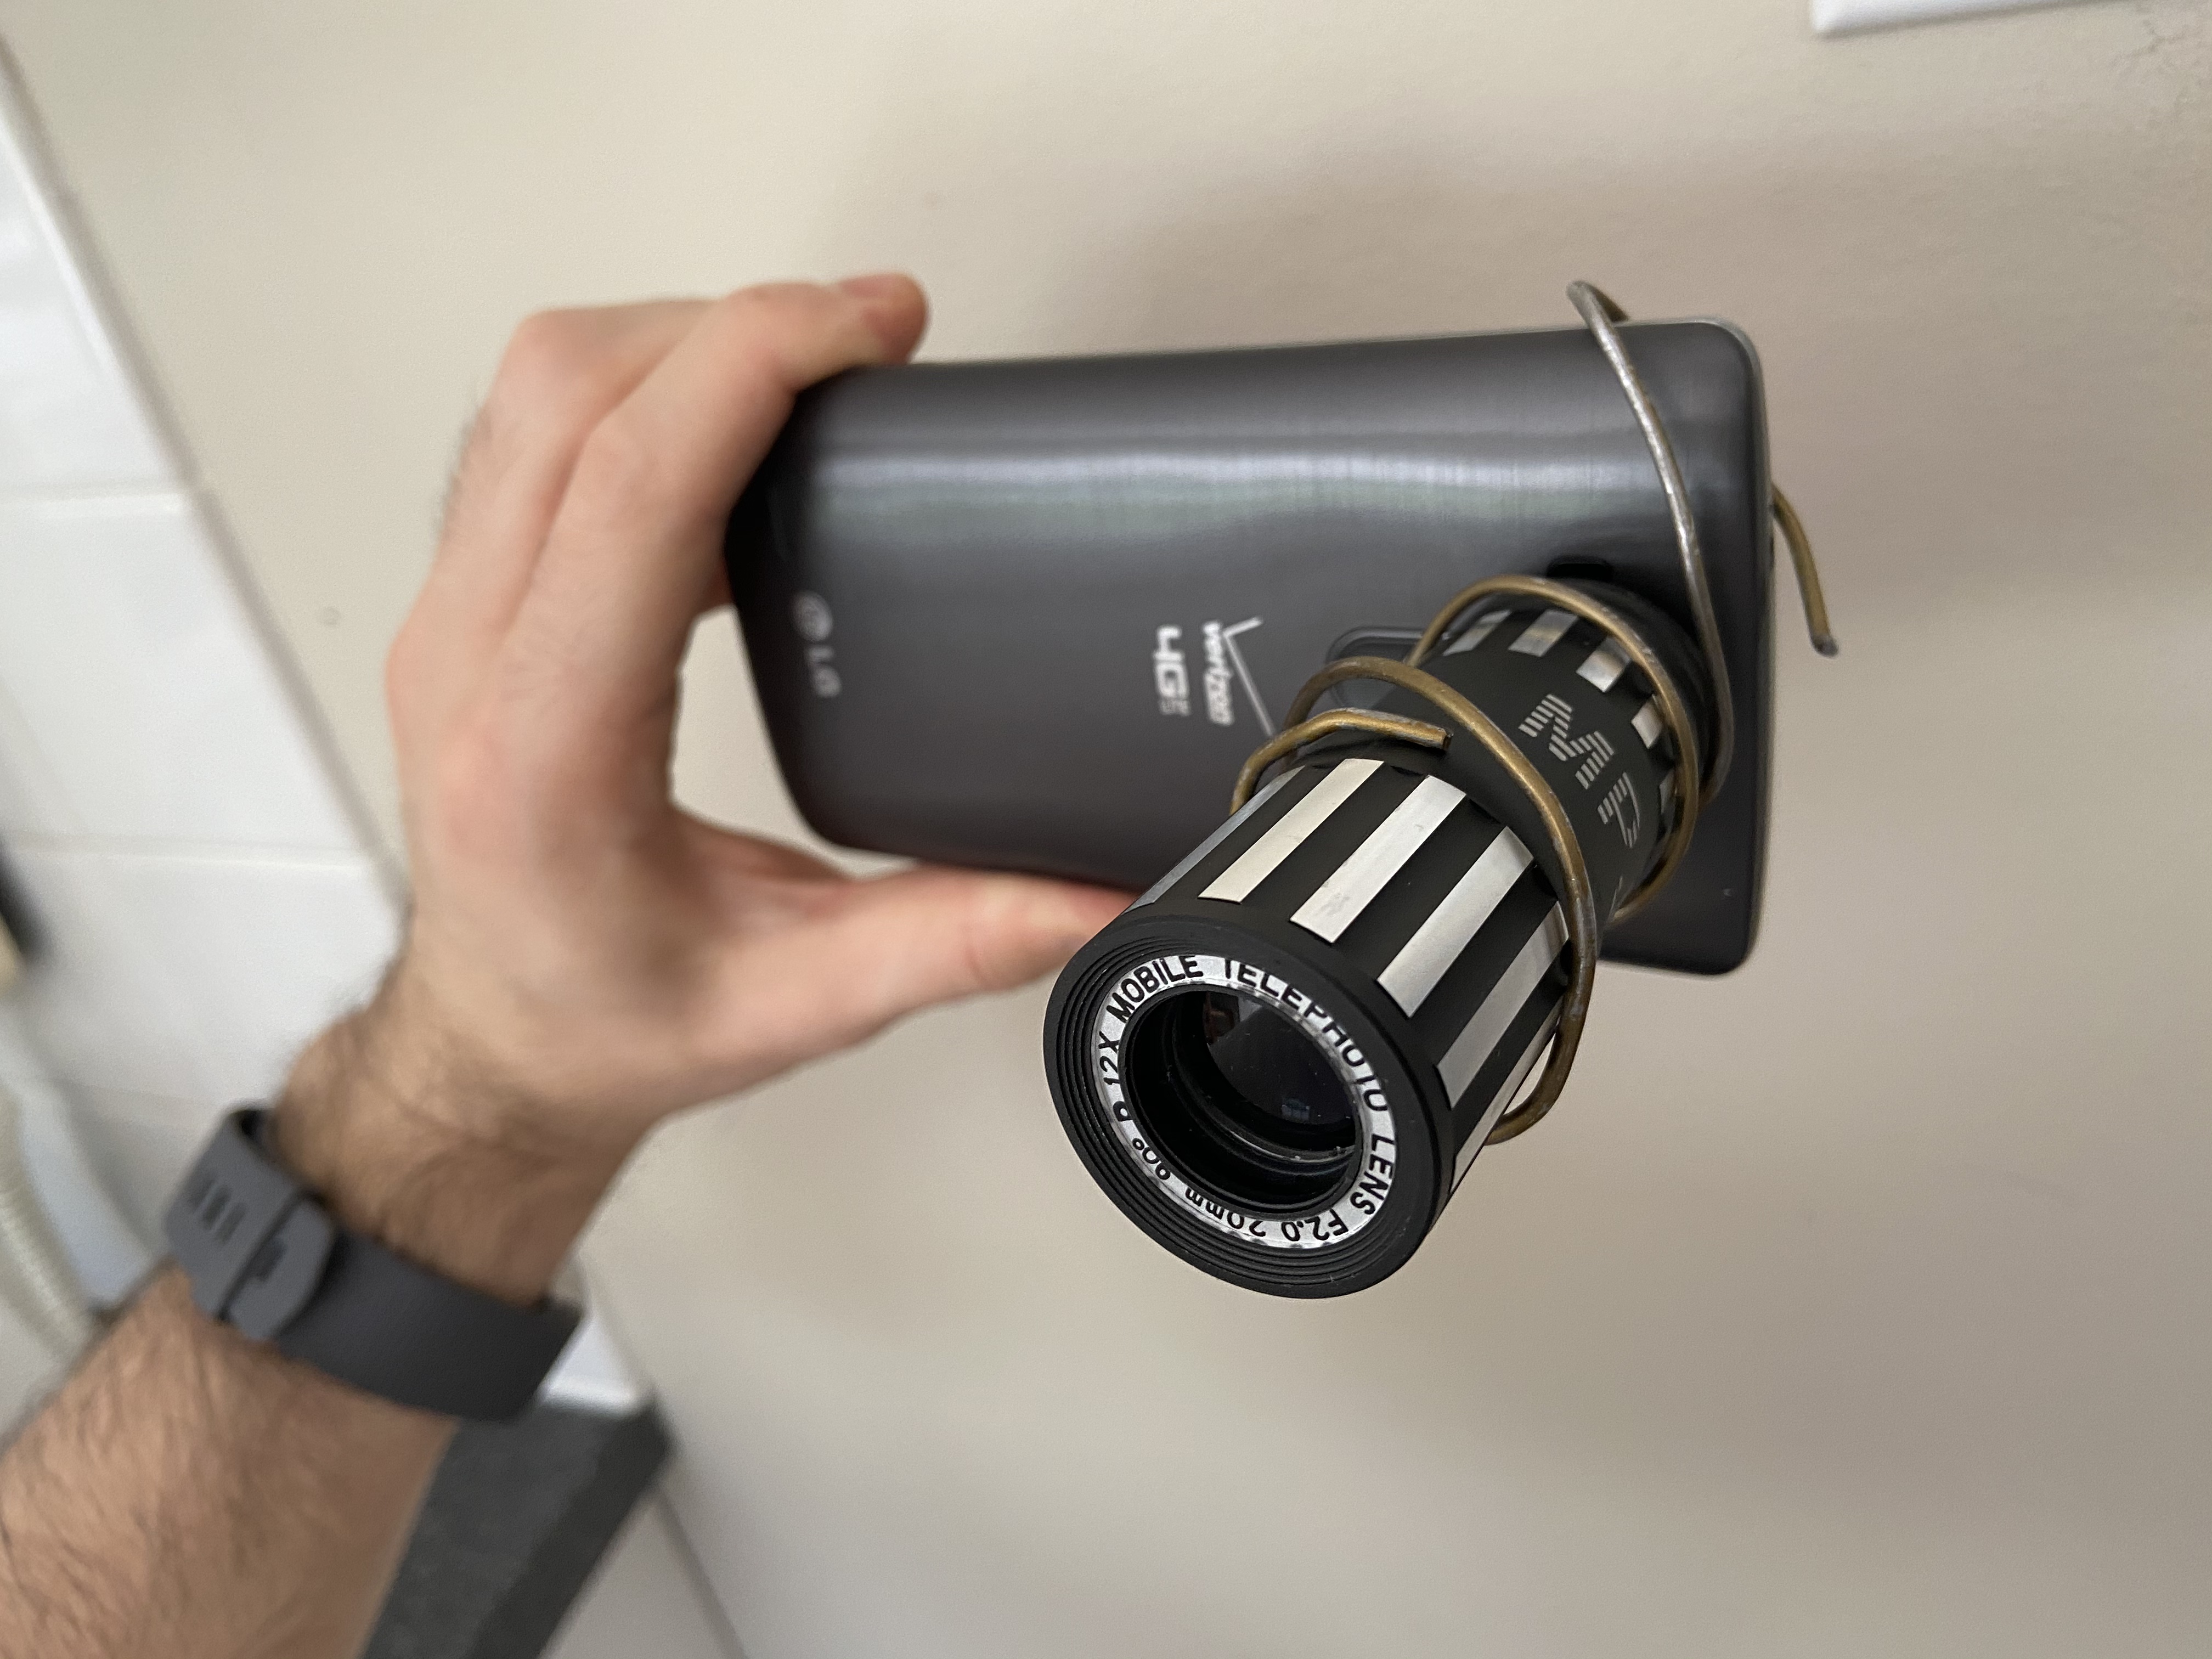
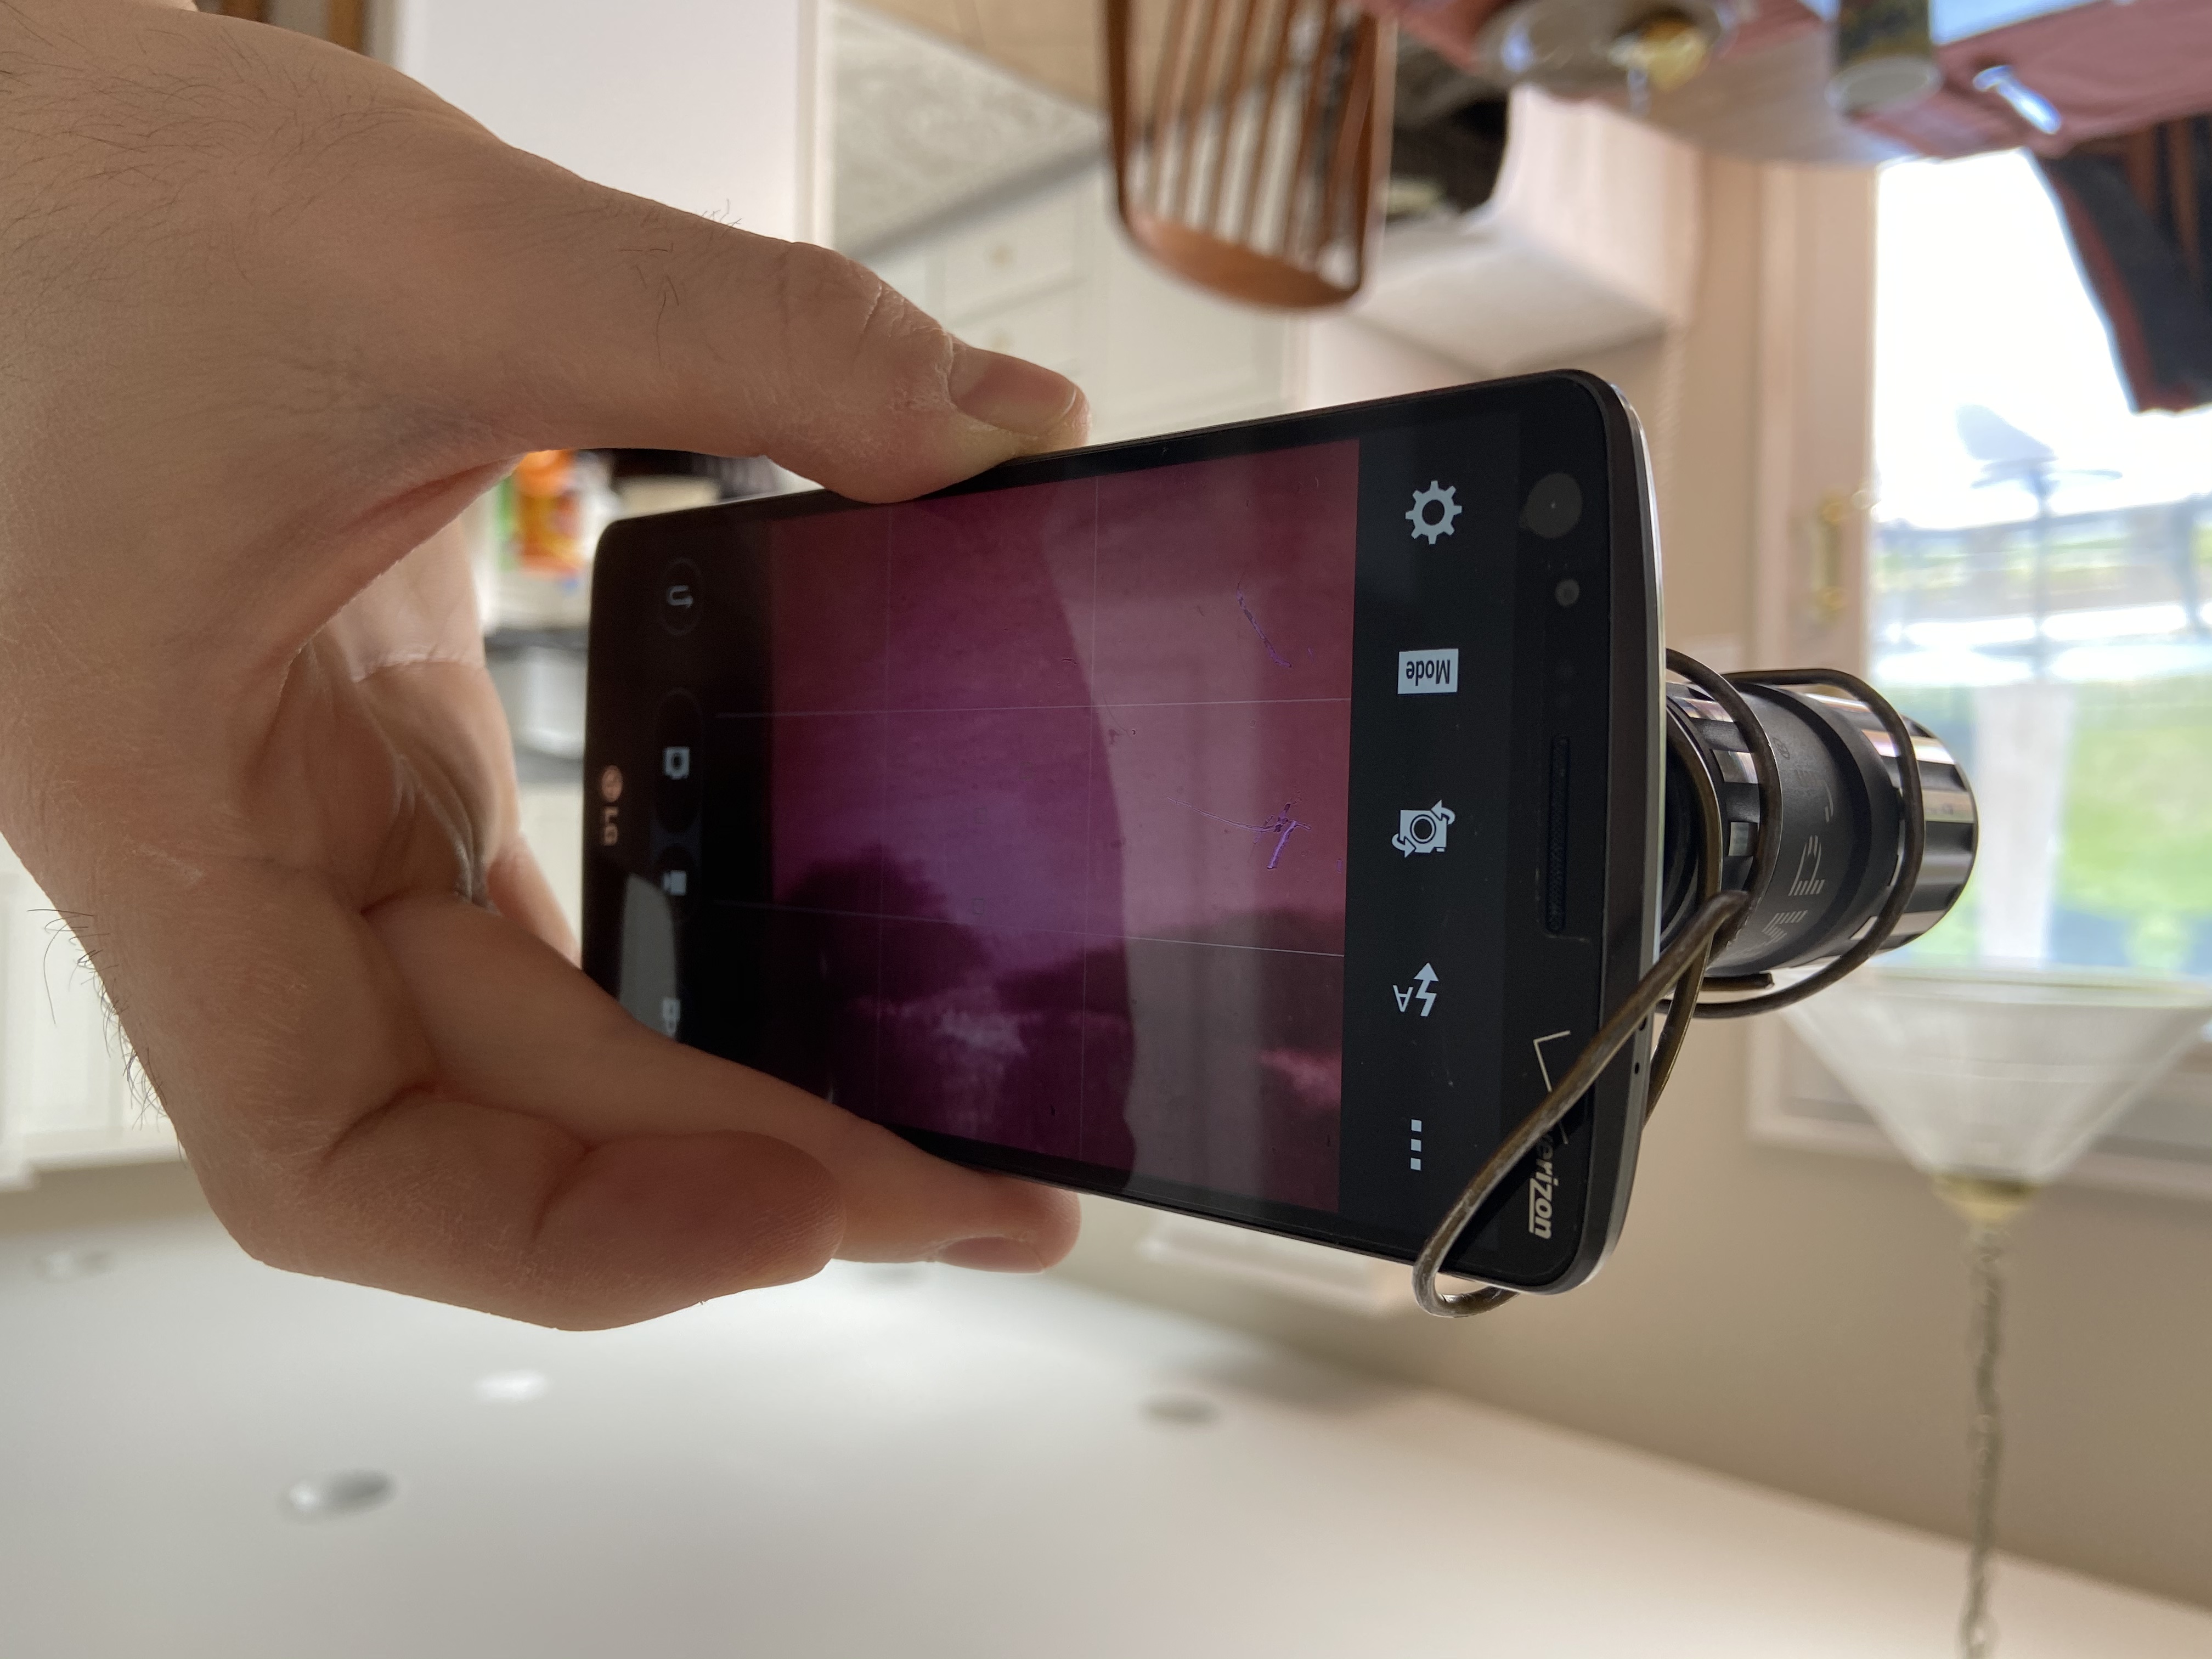
Hacking the optics
Instead of properly replacing the filter with matched glass, I improvised. I retrofitted an old iPhone 6 telephoto lens onto the G3 using a bent coat hanger as a crude mount. It was not elegant, but with careful alignment it worked well enough to take outdoor images.
I also experimented with stacking colored filters from an old flashlight between the phone lens and the telephoto lens to suppress more visible light and bias the setup toward IR.
Editing the images
Straight out of the camera, the images were not especially dramatic. The look came from post-processing.
My typical workflow was:
- set white balance
- apply a color profile
- swap red and blue channels
- push the grade toward the classic pink foliage / blue sky infrared look
Because the files needed heavy manipulation, shooting RAW/DNG helped whenever possible. I was able to use Lightroom and Photoshop during this period and leaned on that workflow heavily.
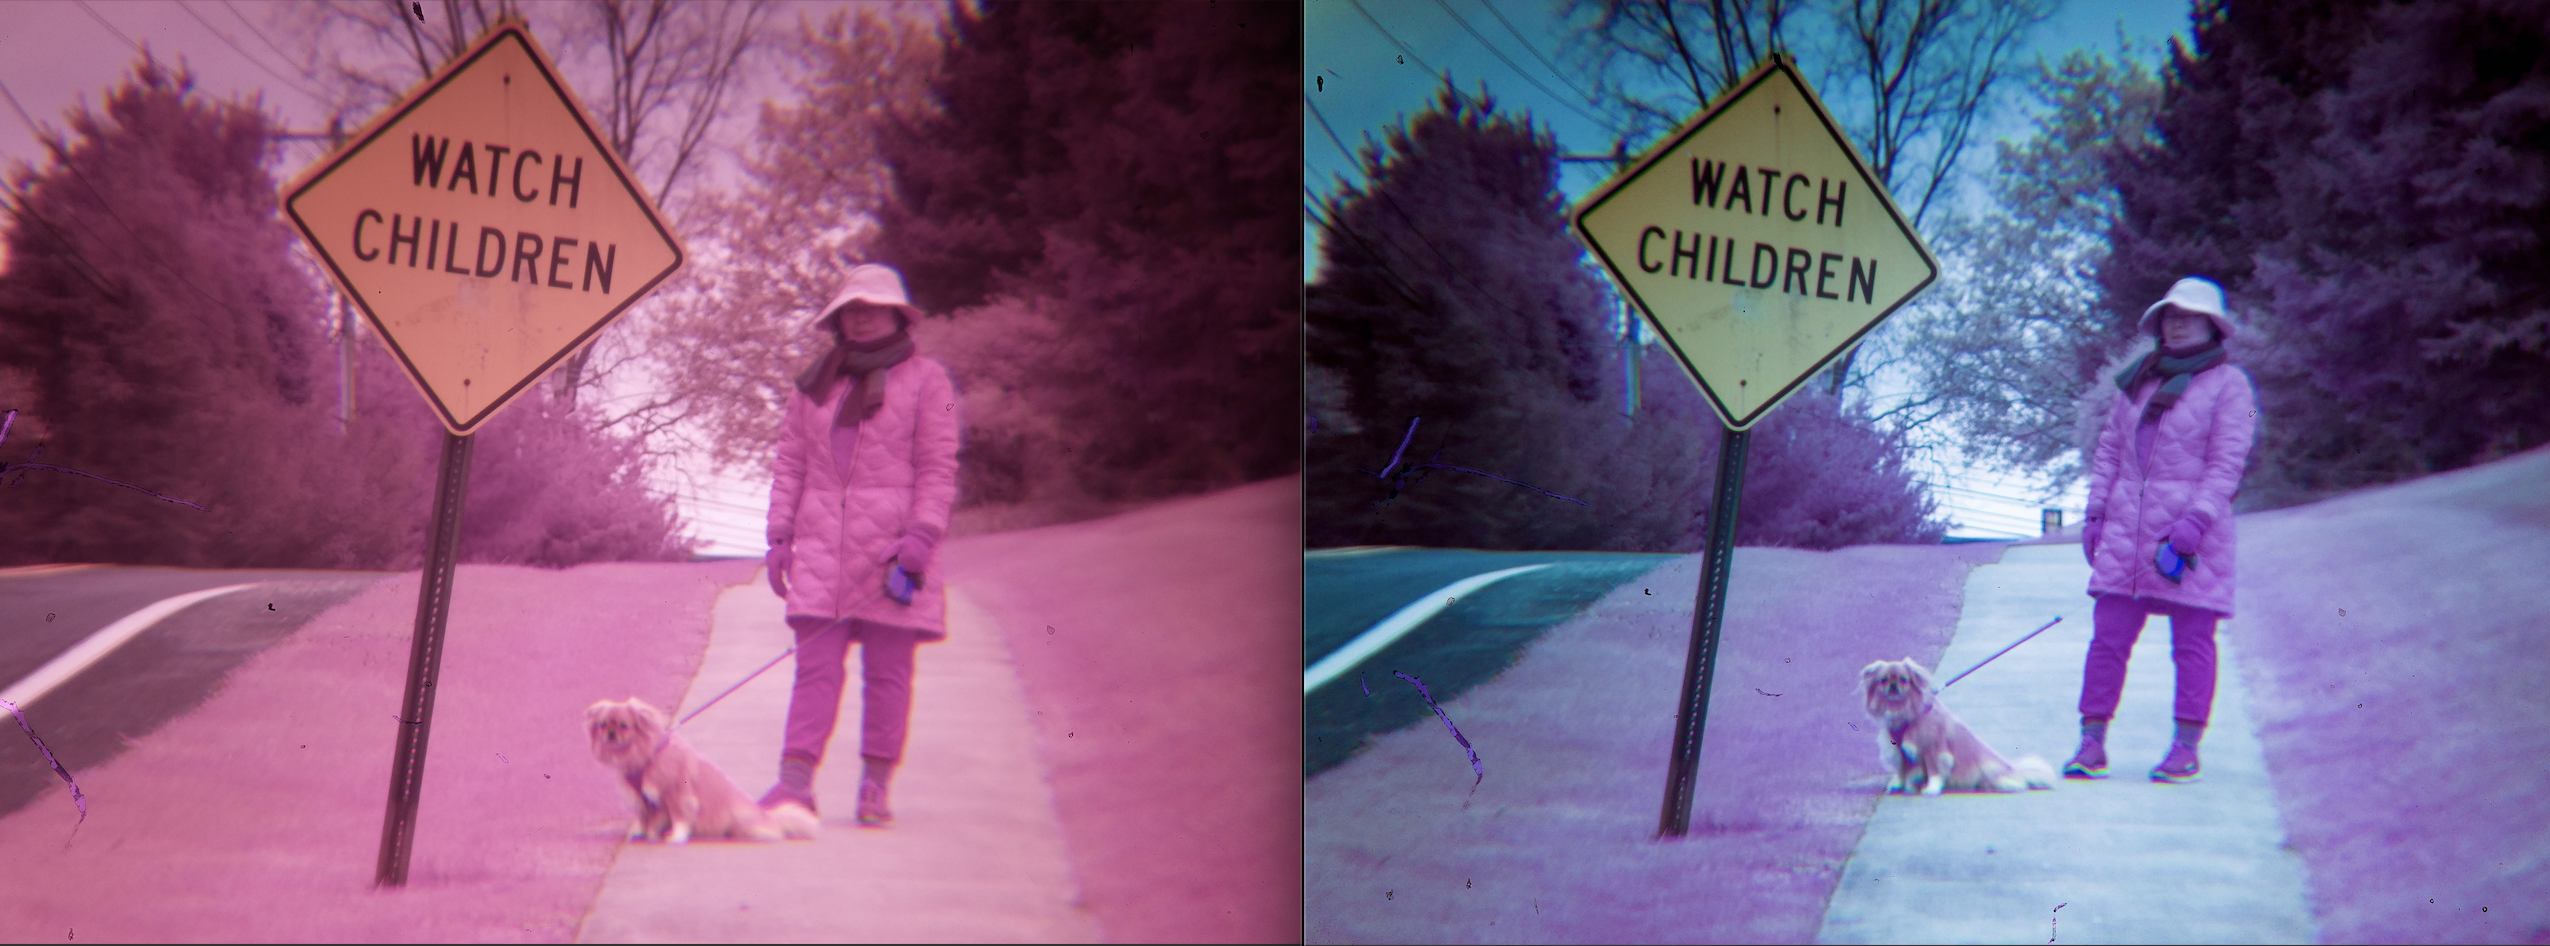
Raw image (left) vs edited infrared result (right).
Unexpected bonus: night vision
A funny side effect of the LG conversion was that the phone’s IR autofocus emitter became visible to the modified sensor. In a completely dark room, the phone could effectively illuminate the scene with its own IR pulses, creating a crude night-vision view on screen.
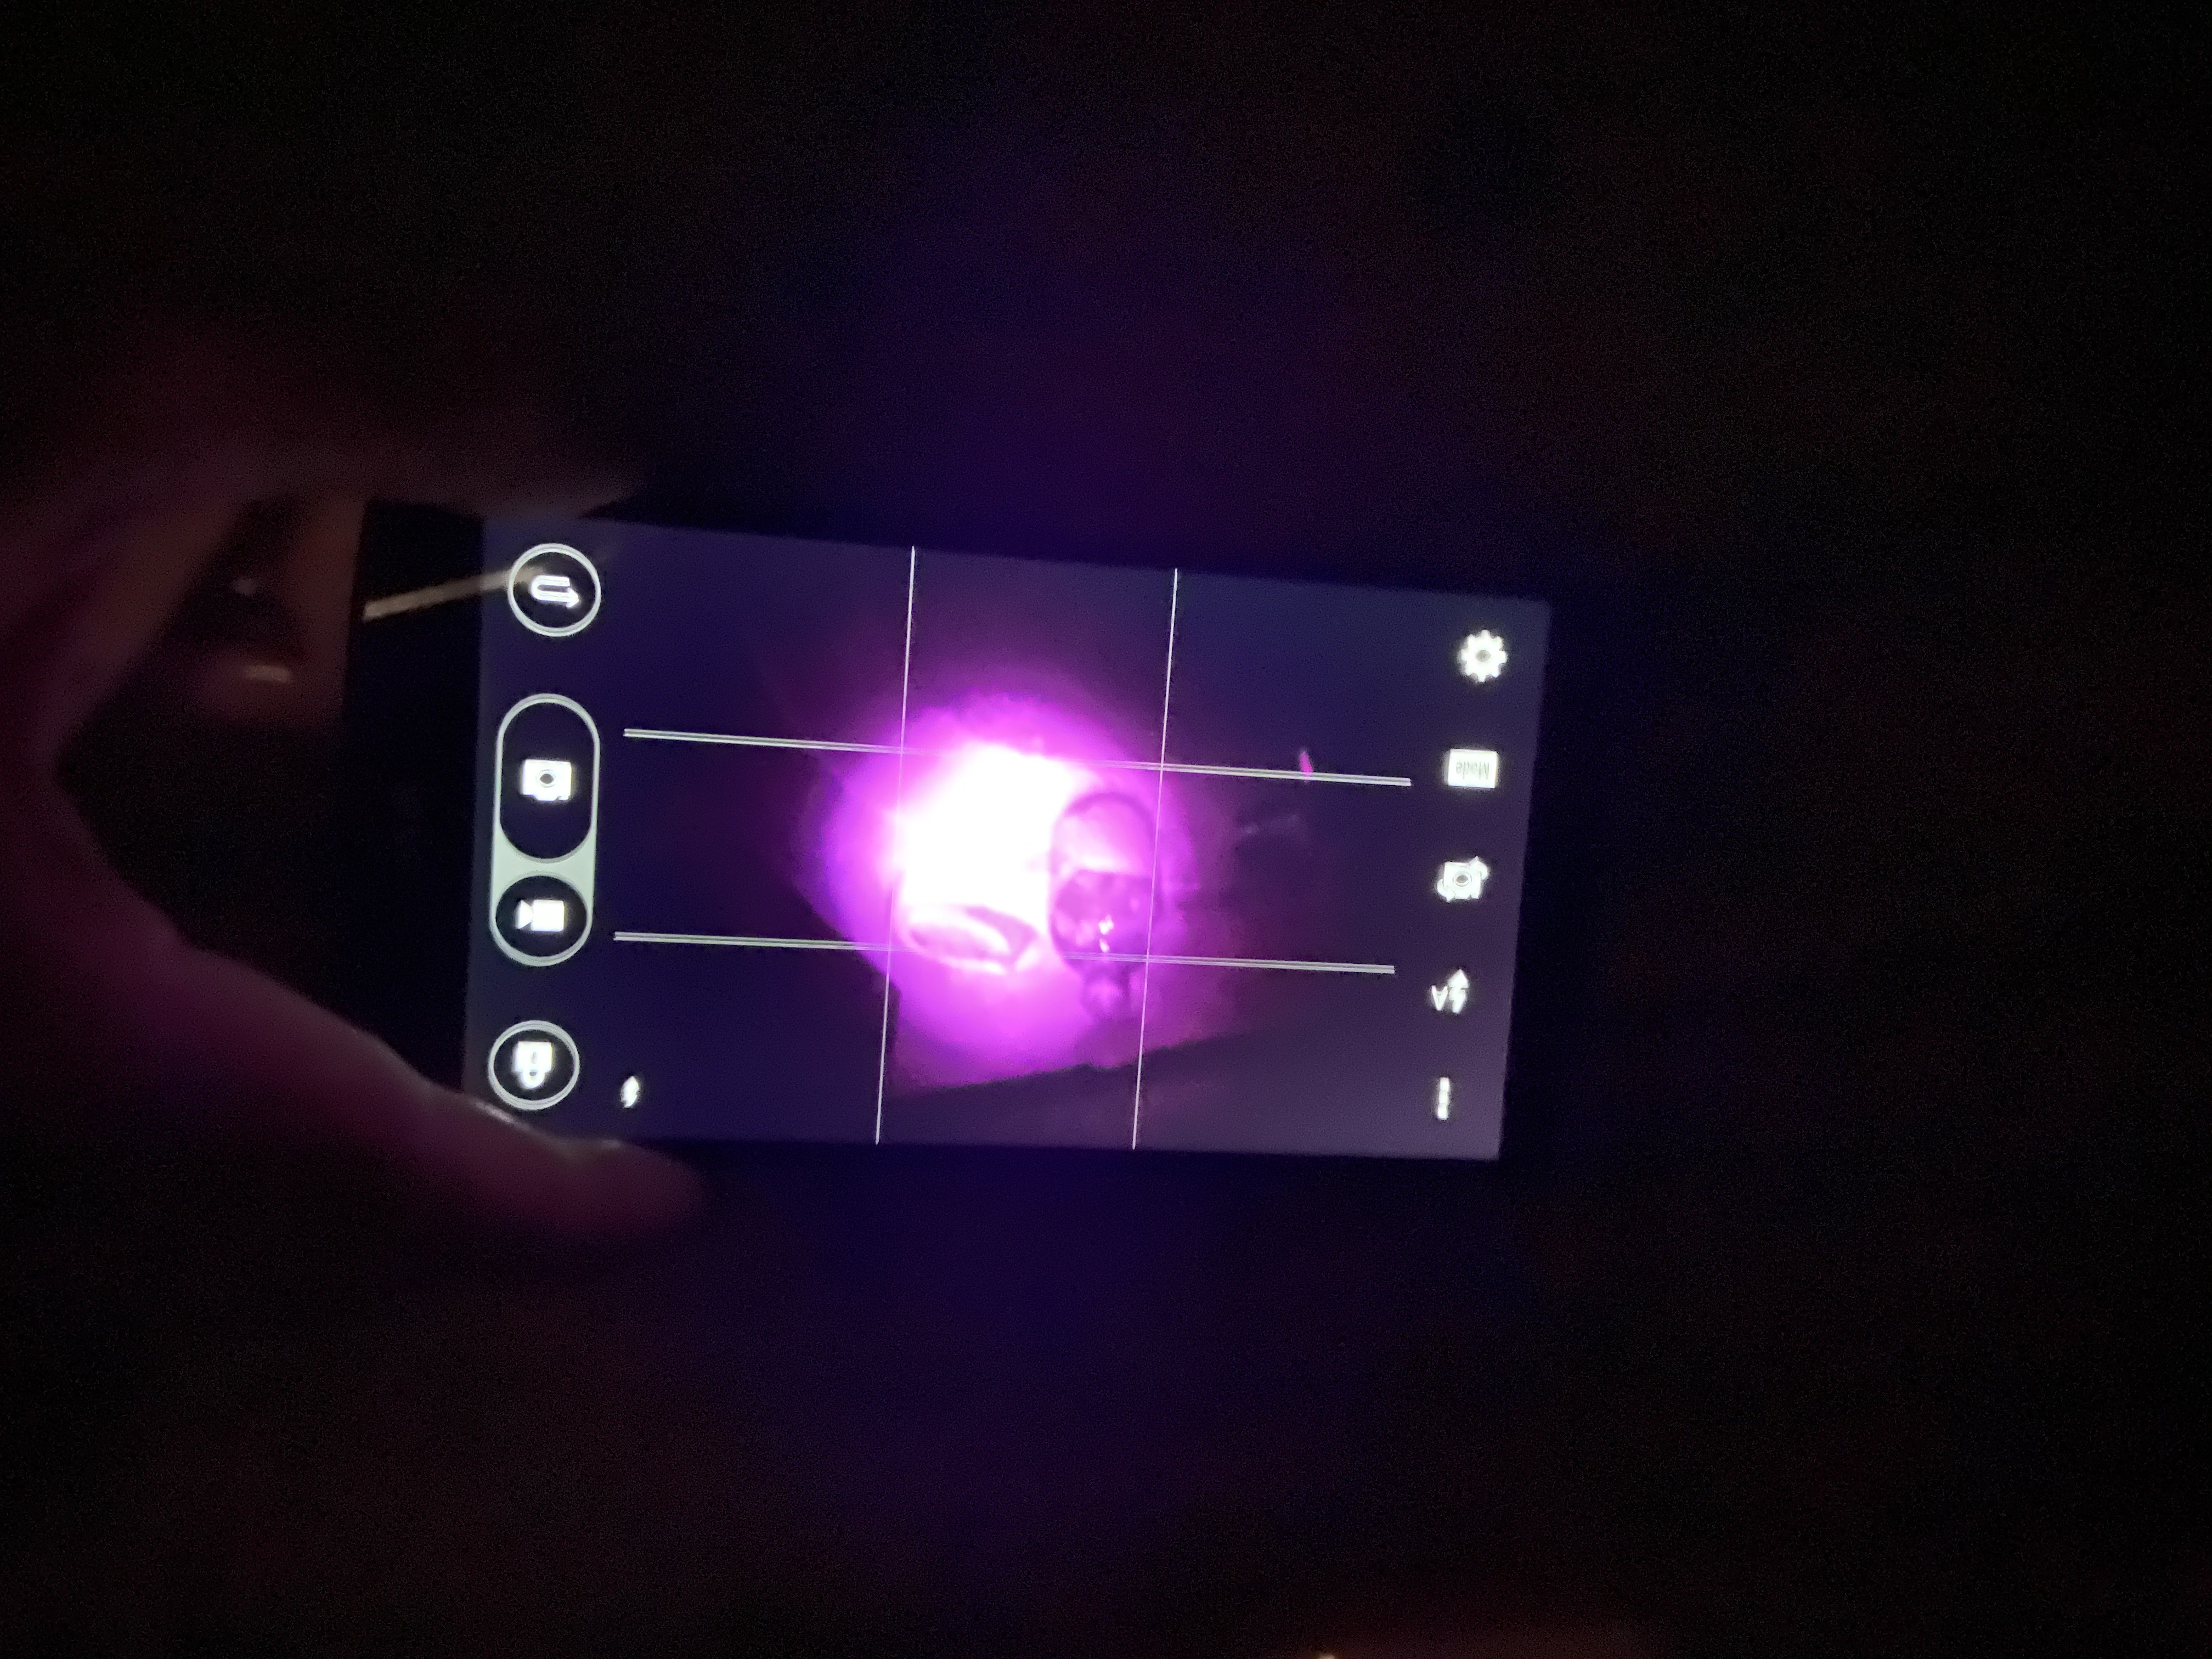
Soap in a bathroom photographed in complete darkness using the phone’s IR autofocus illumination.
Build 2: Sony Cyber-shot DSC-H20 full-spectrum conversion
After proving the idea on the LG G3, I wanted something more practical for outdoor shooting. I later converted a Sony Cyber-shot DSC-H20, which was a better fit for general-purpose infrared photography: compact, landscape-capable, and easier to handle than the hacked phone setup.
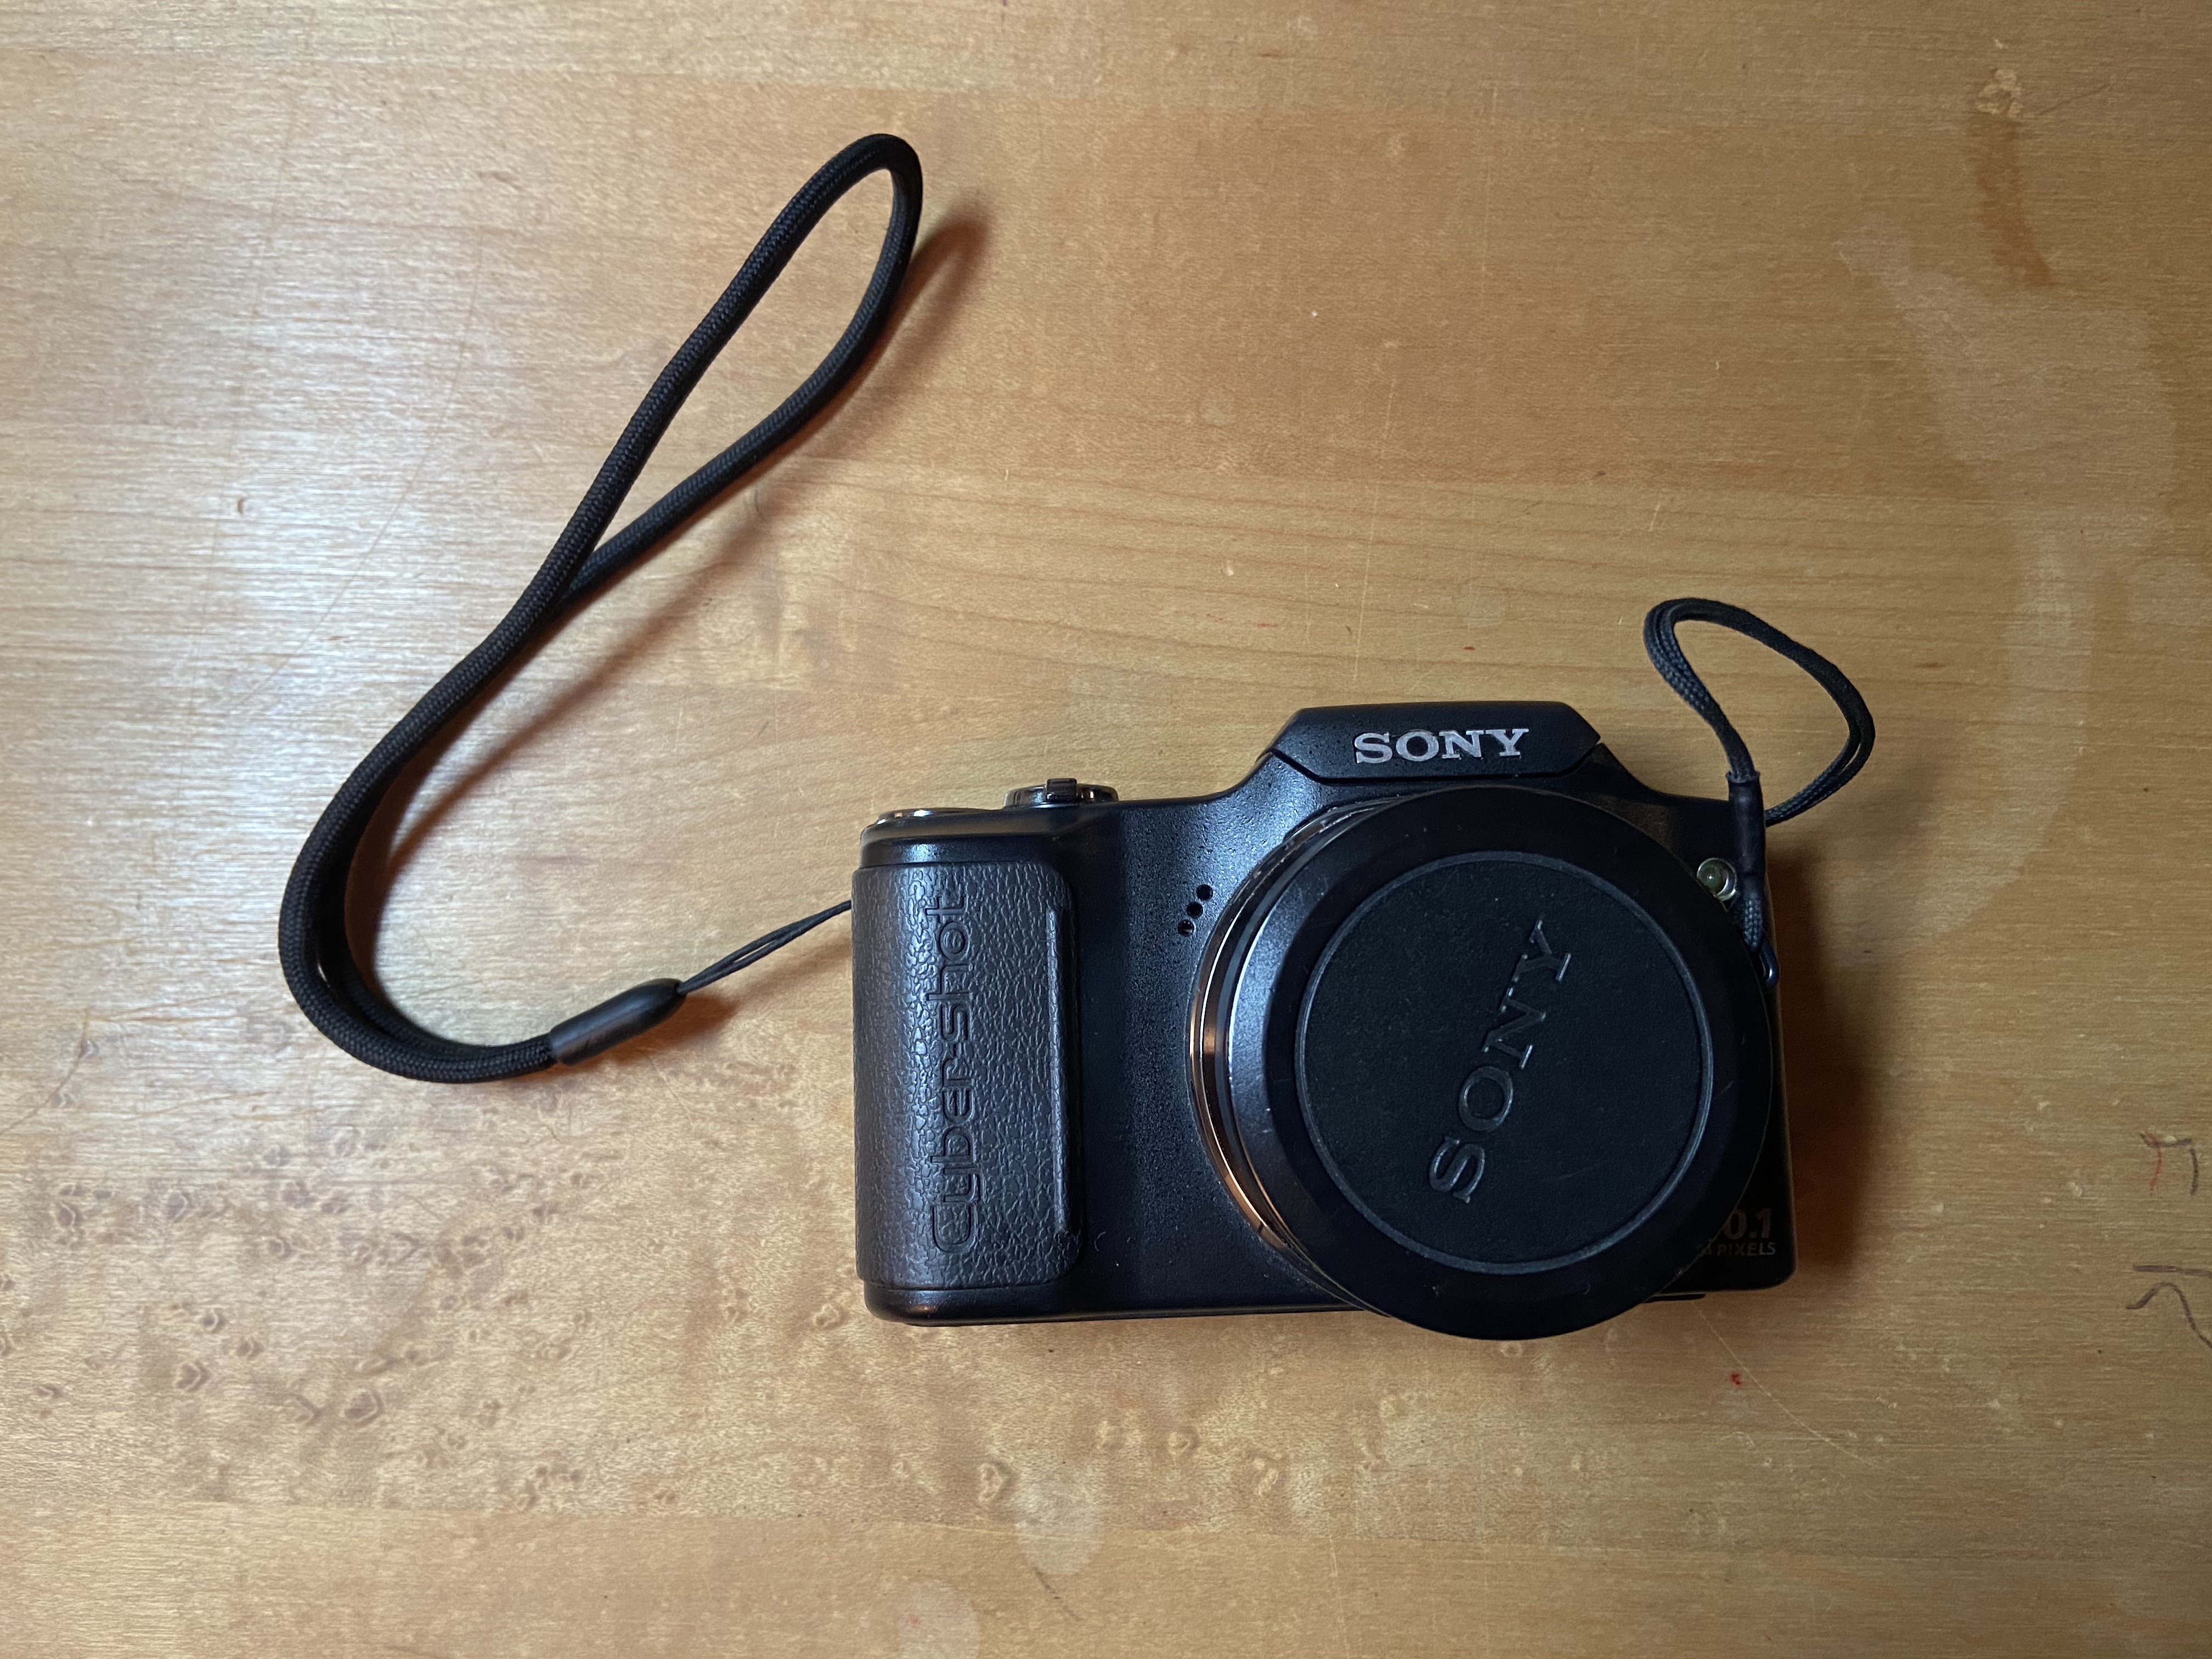
This conversion was also much cleaner. Unlike the phone, the Sony was relatively straightforward to open, and the filter was not glued in place. The whole process mostly required patience and a tiny screwdriver.
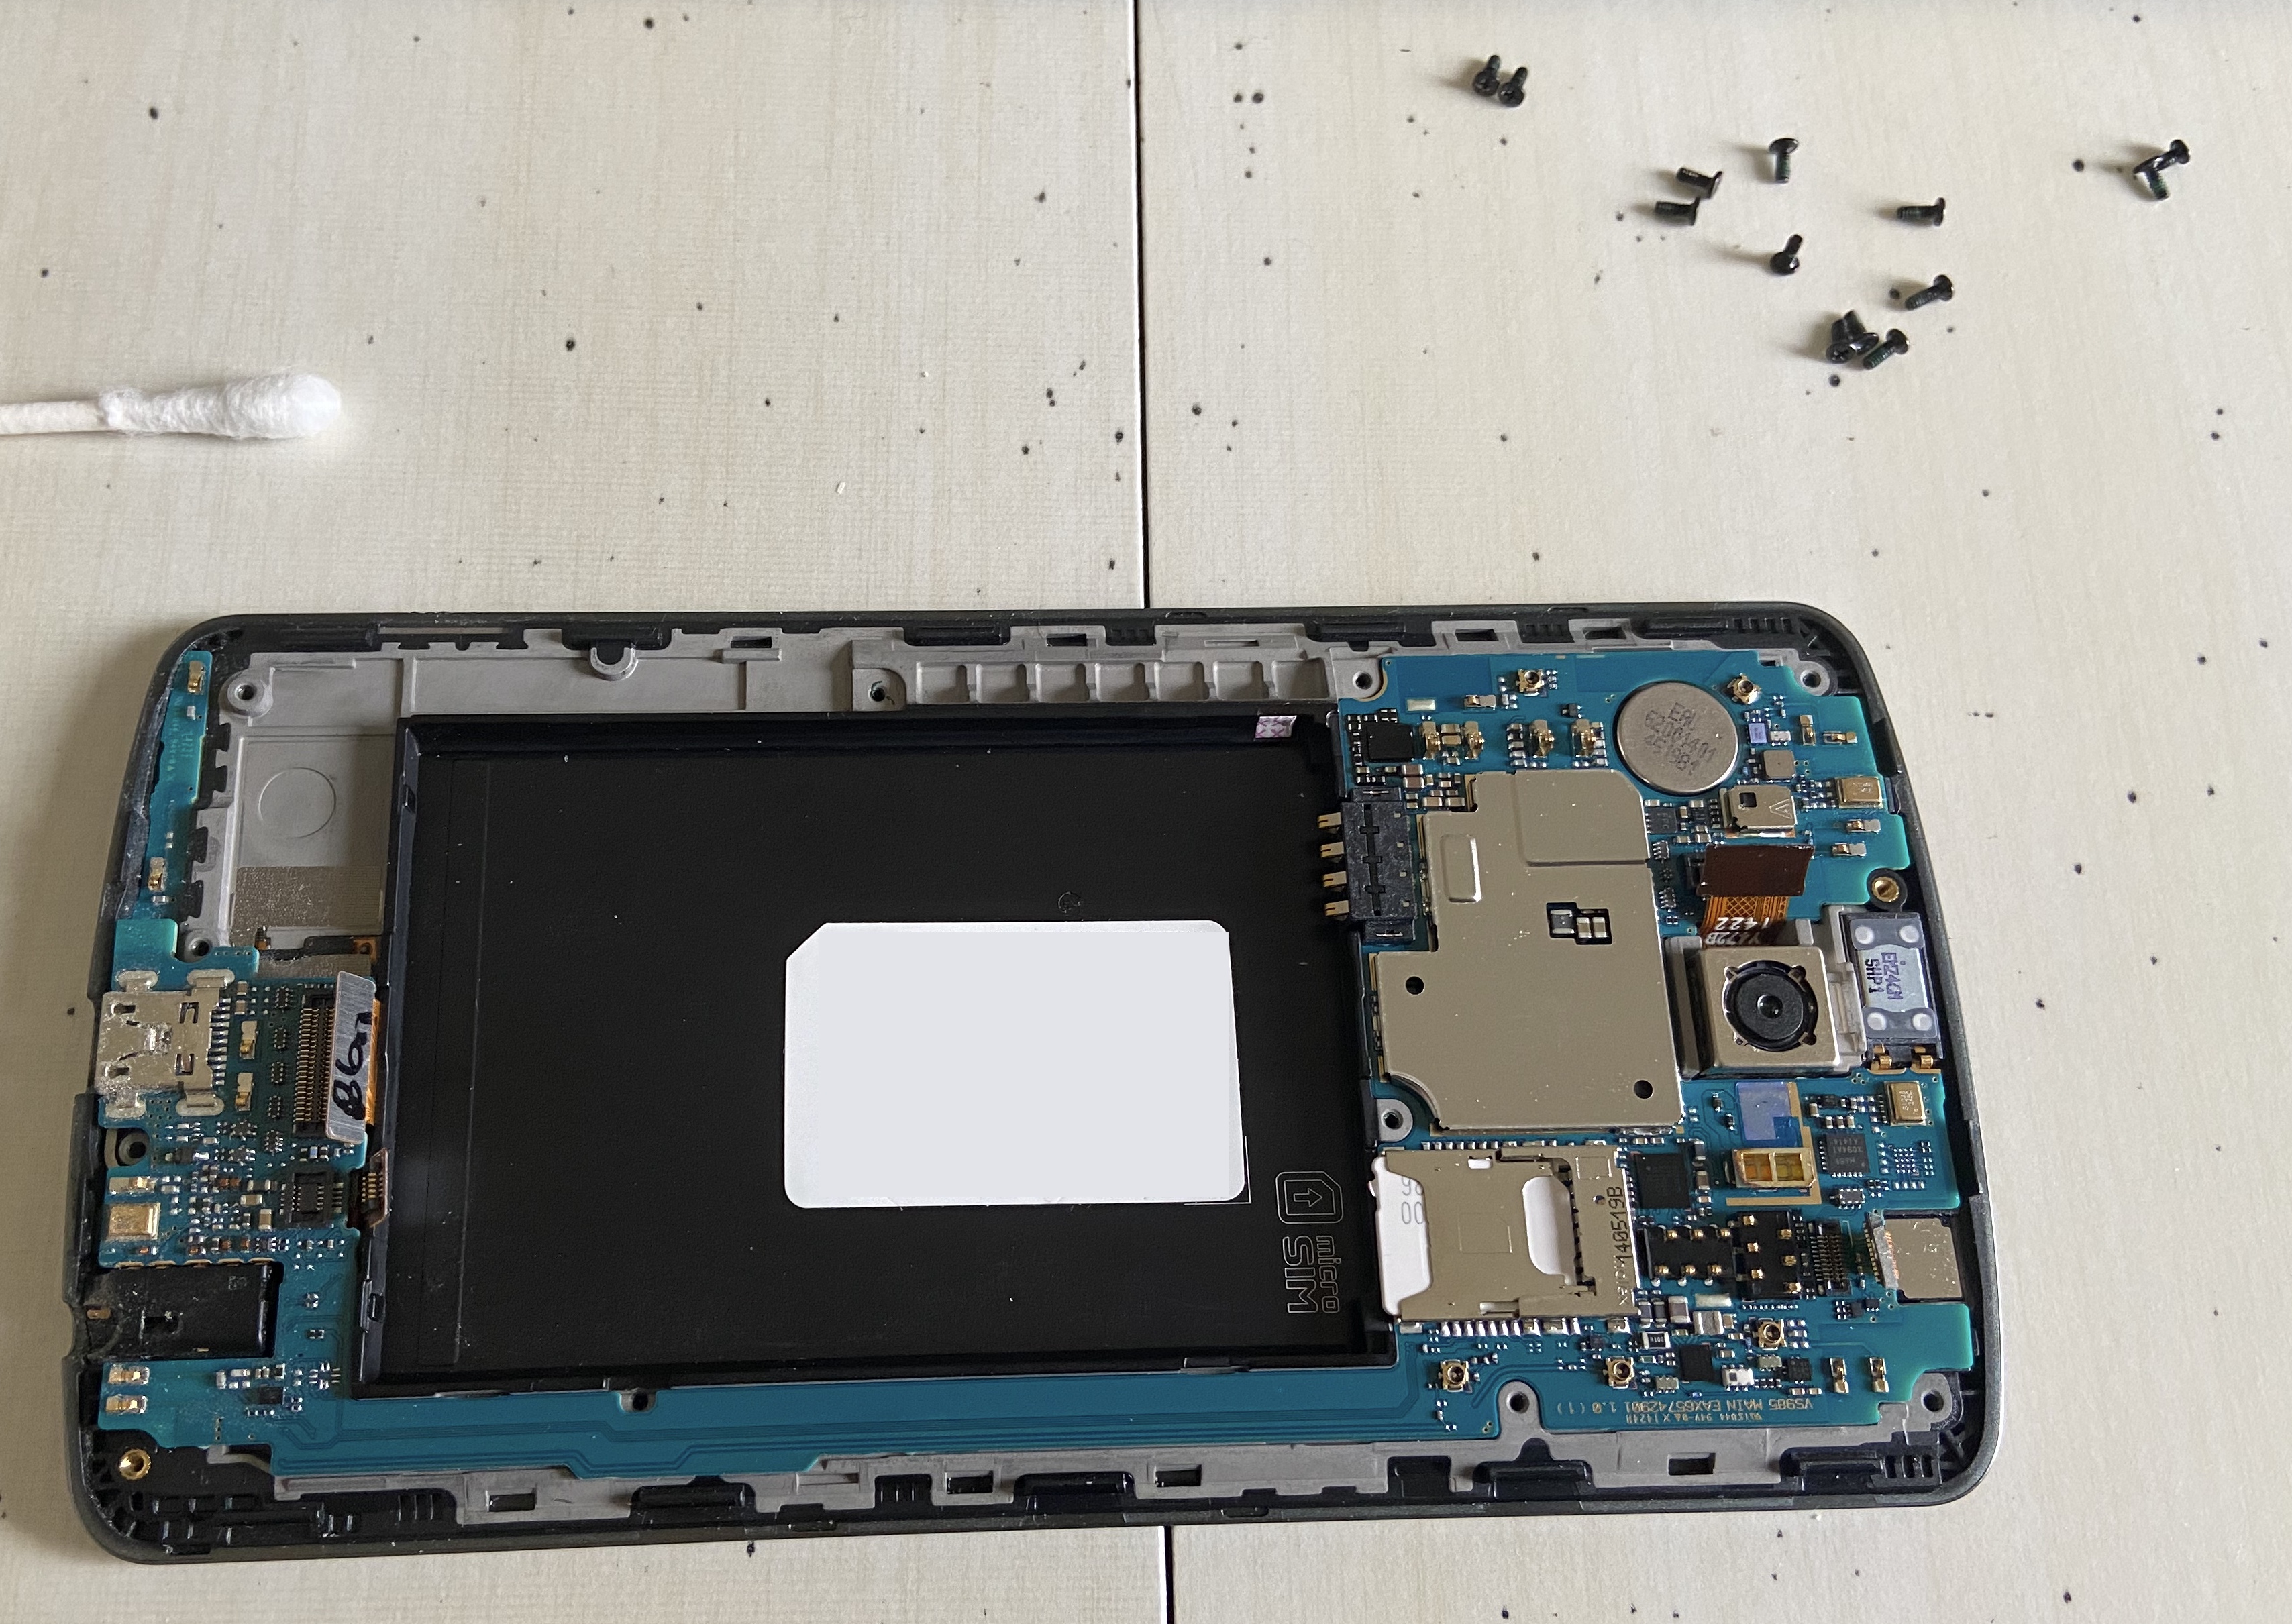
Sony conversion notes
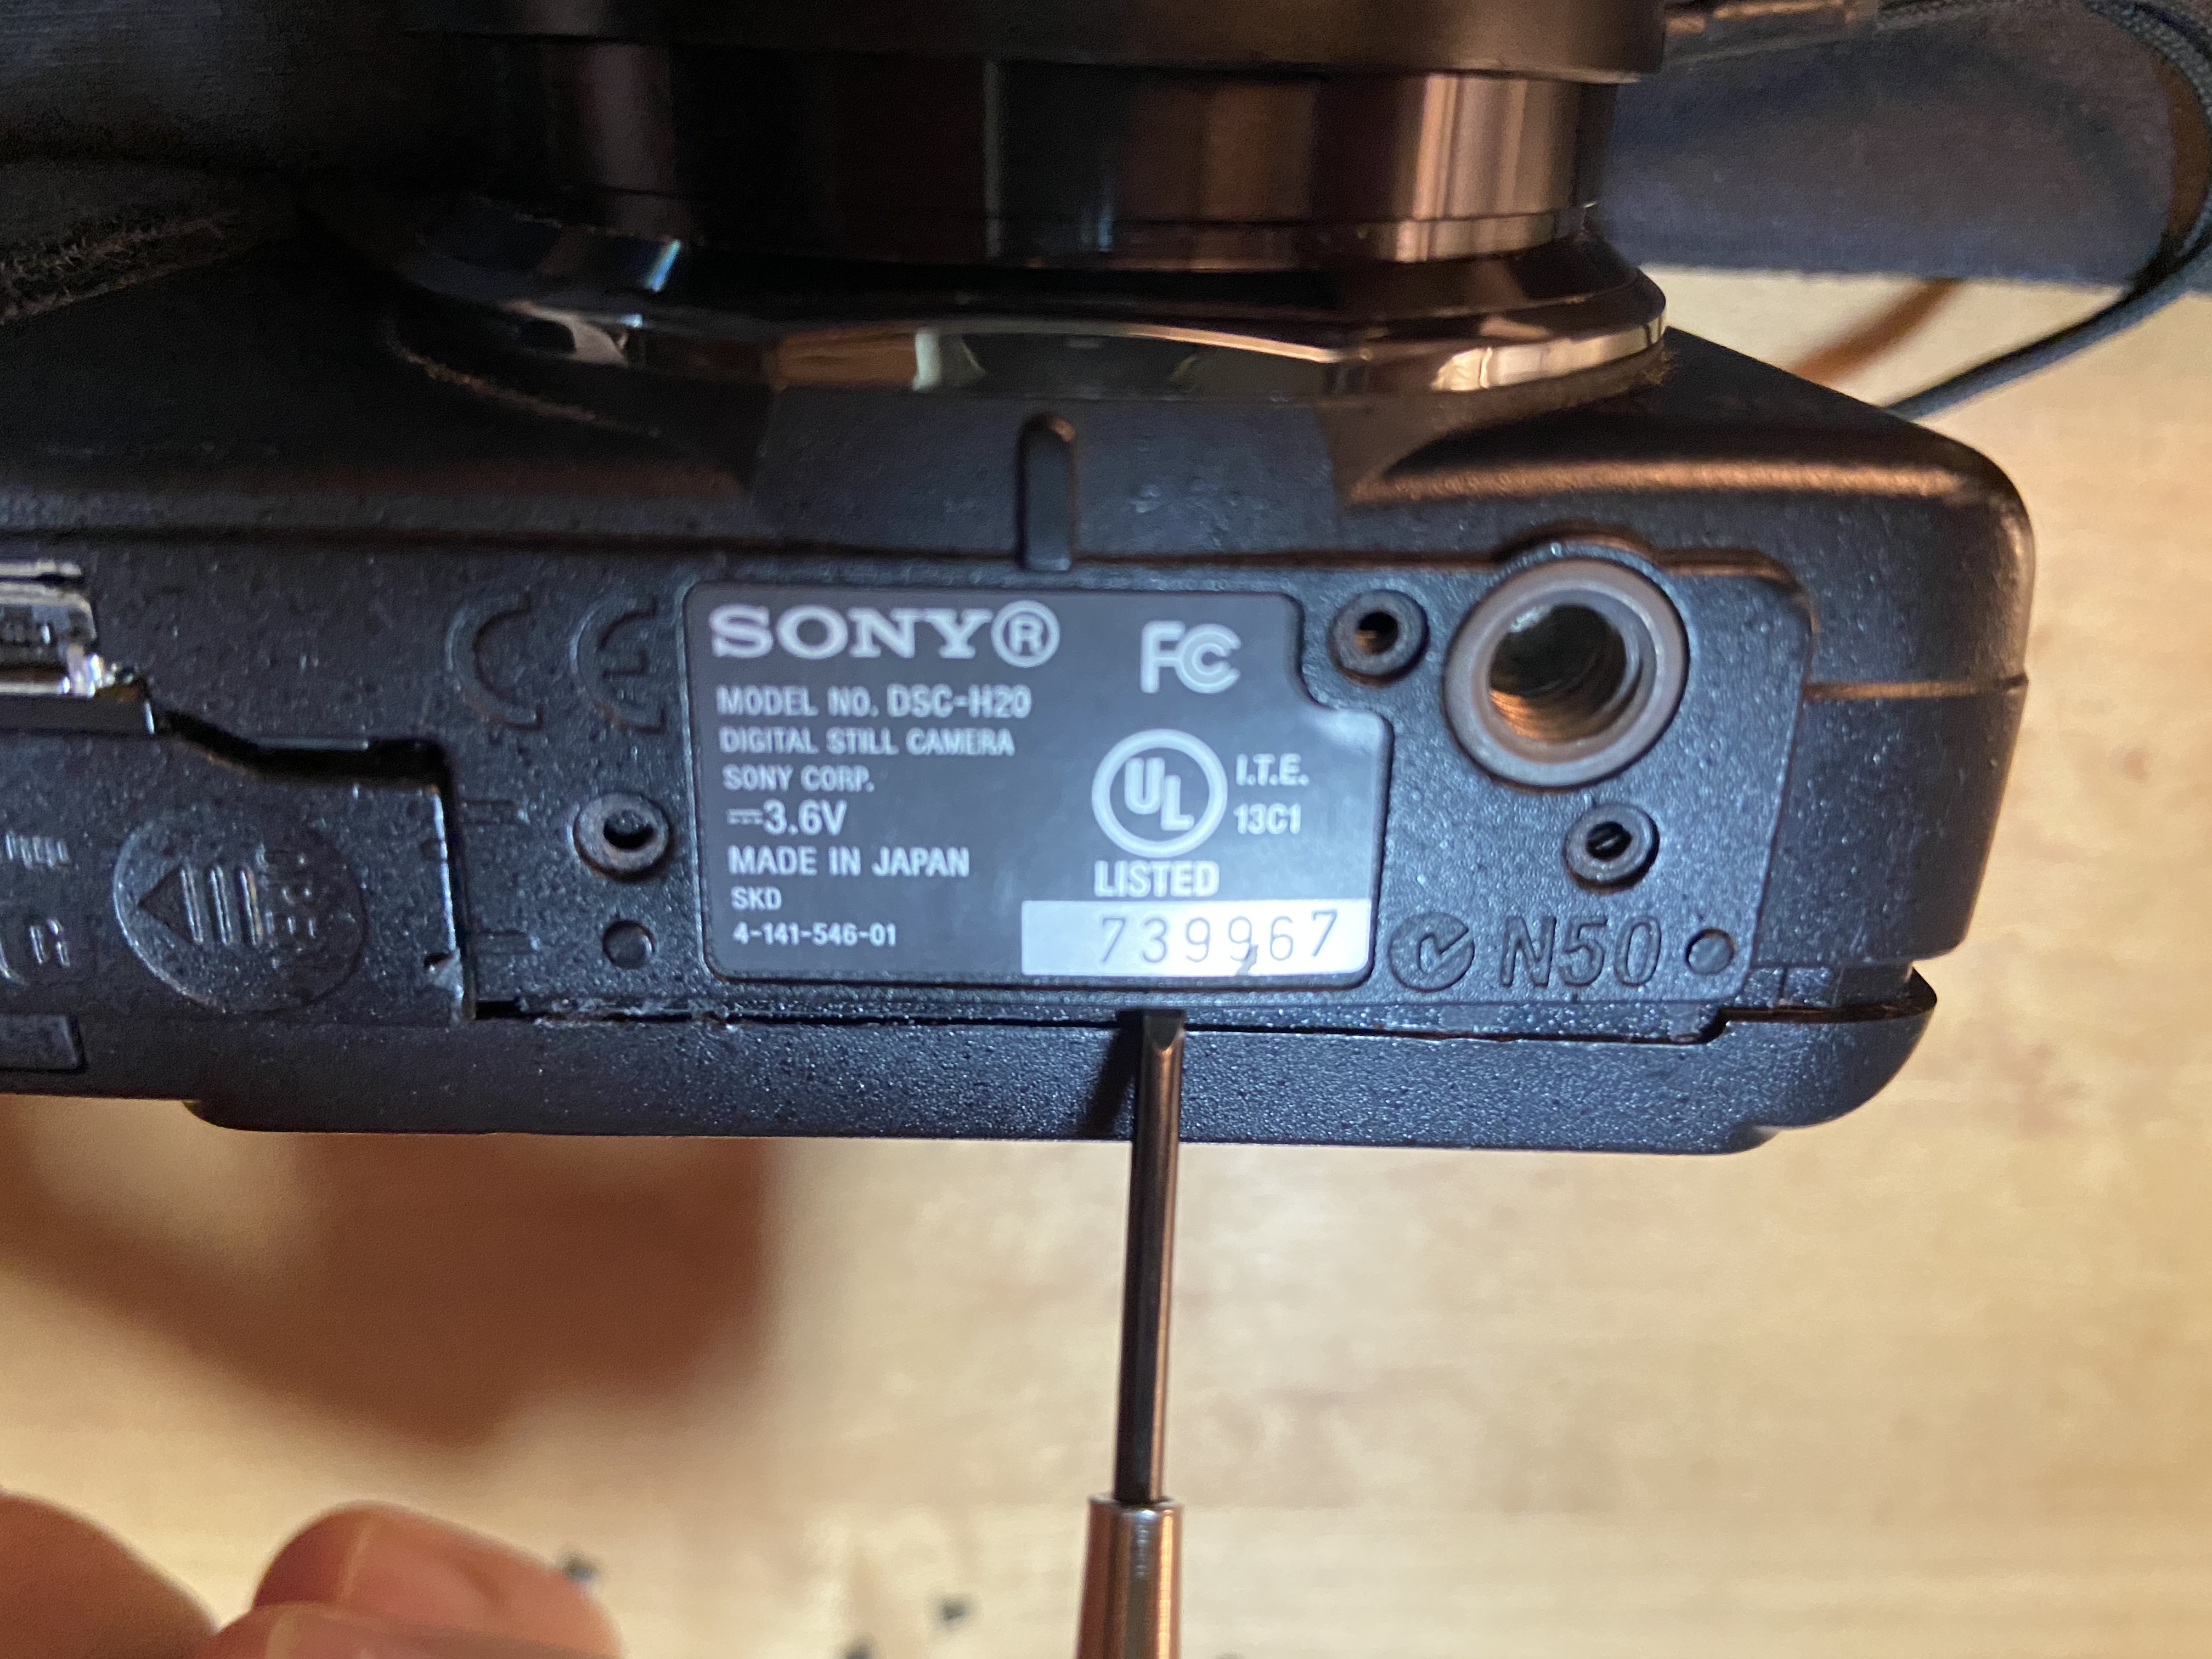
Step 1: Remove the outer screws
There were 8 external screws holding the camera body together, including two hidden below the flash. Missing those makes the disassembly feel like something is stuck when it really is not.
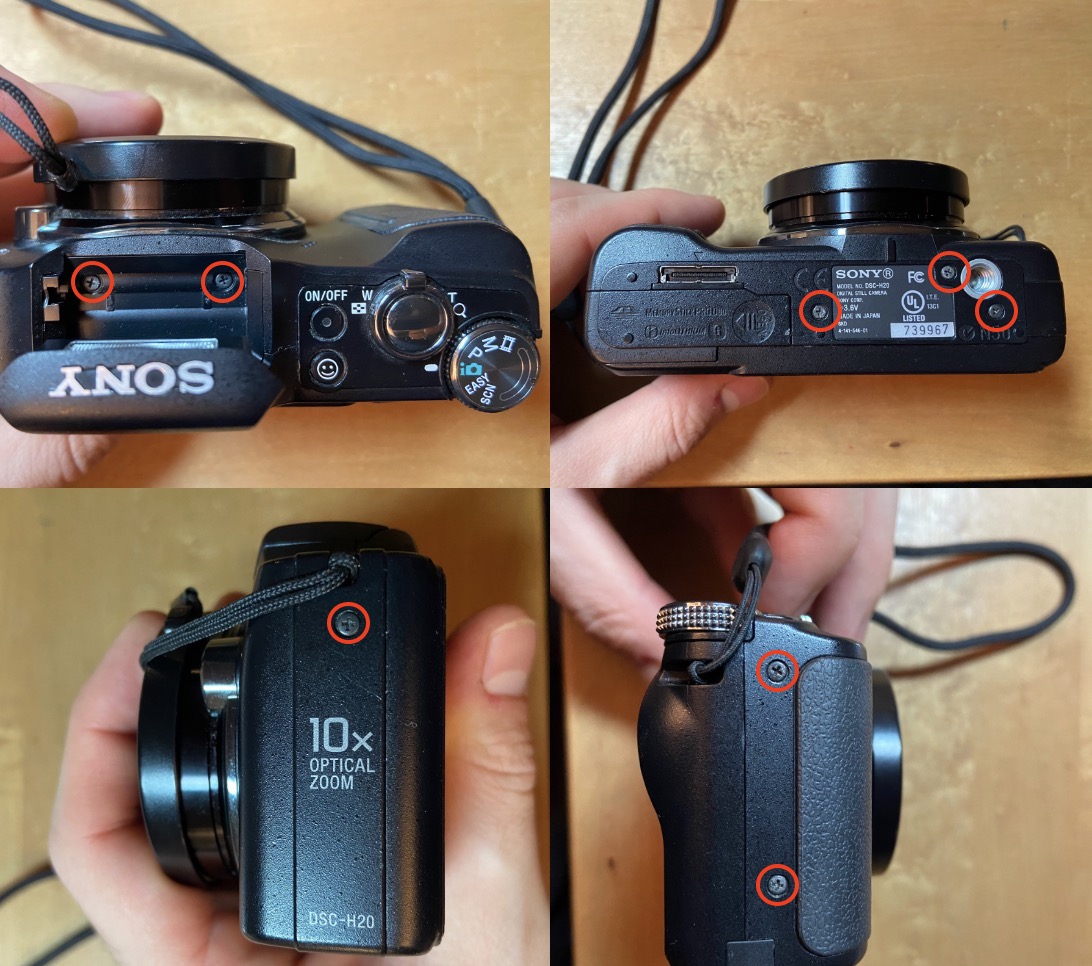
Step 2: Pry open the case
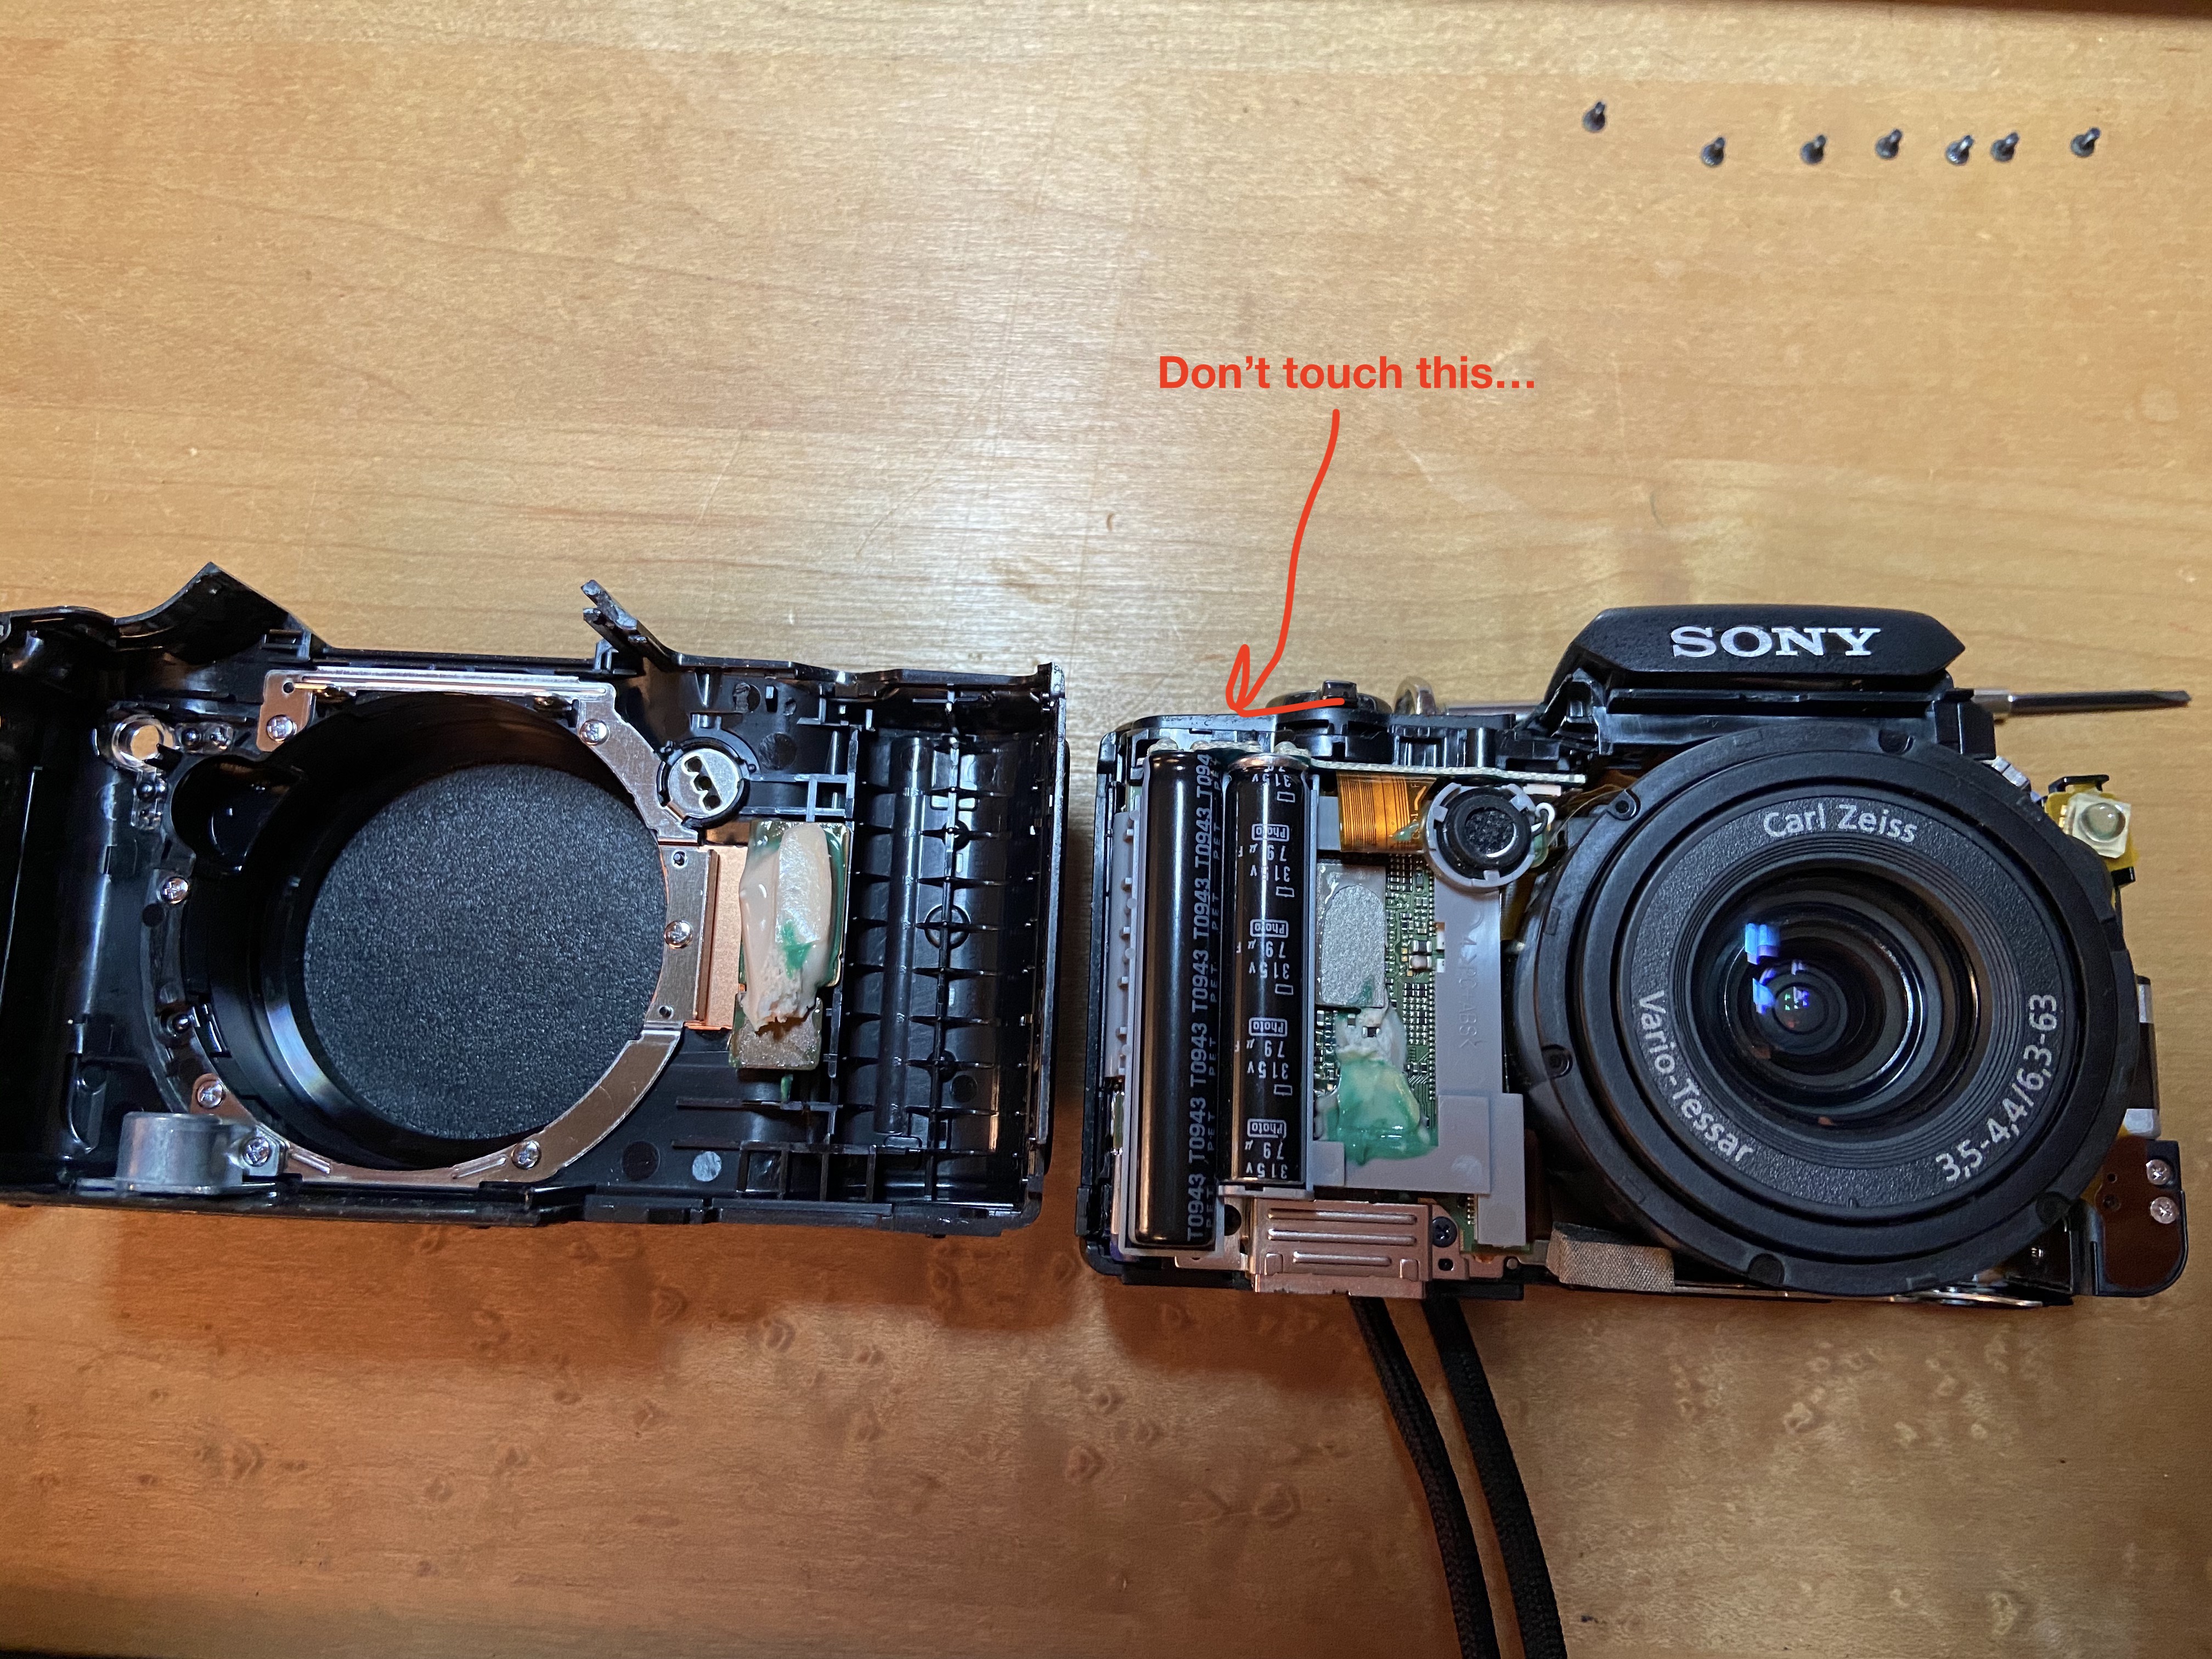
Once all screws were removed, I carefully separated the shell from the bottom seam.
Step 3: Avoid the capacitors
With the case open, the internals are exposed, including capacitors I definitely did not want to touch.
Step 4: Access the lens/sensor assembly
It was possible to sneak the lens assembly out far enough to reach the sensor/filter area without fully tearing down the camera.
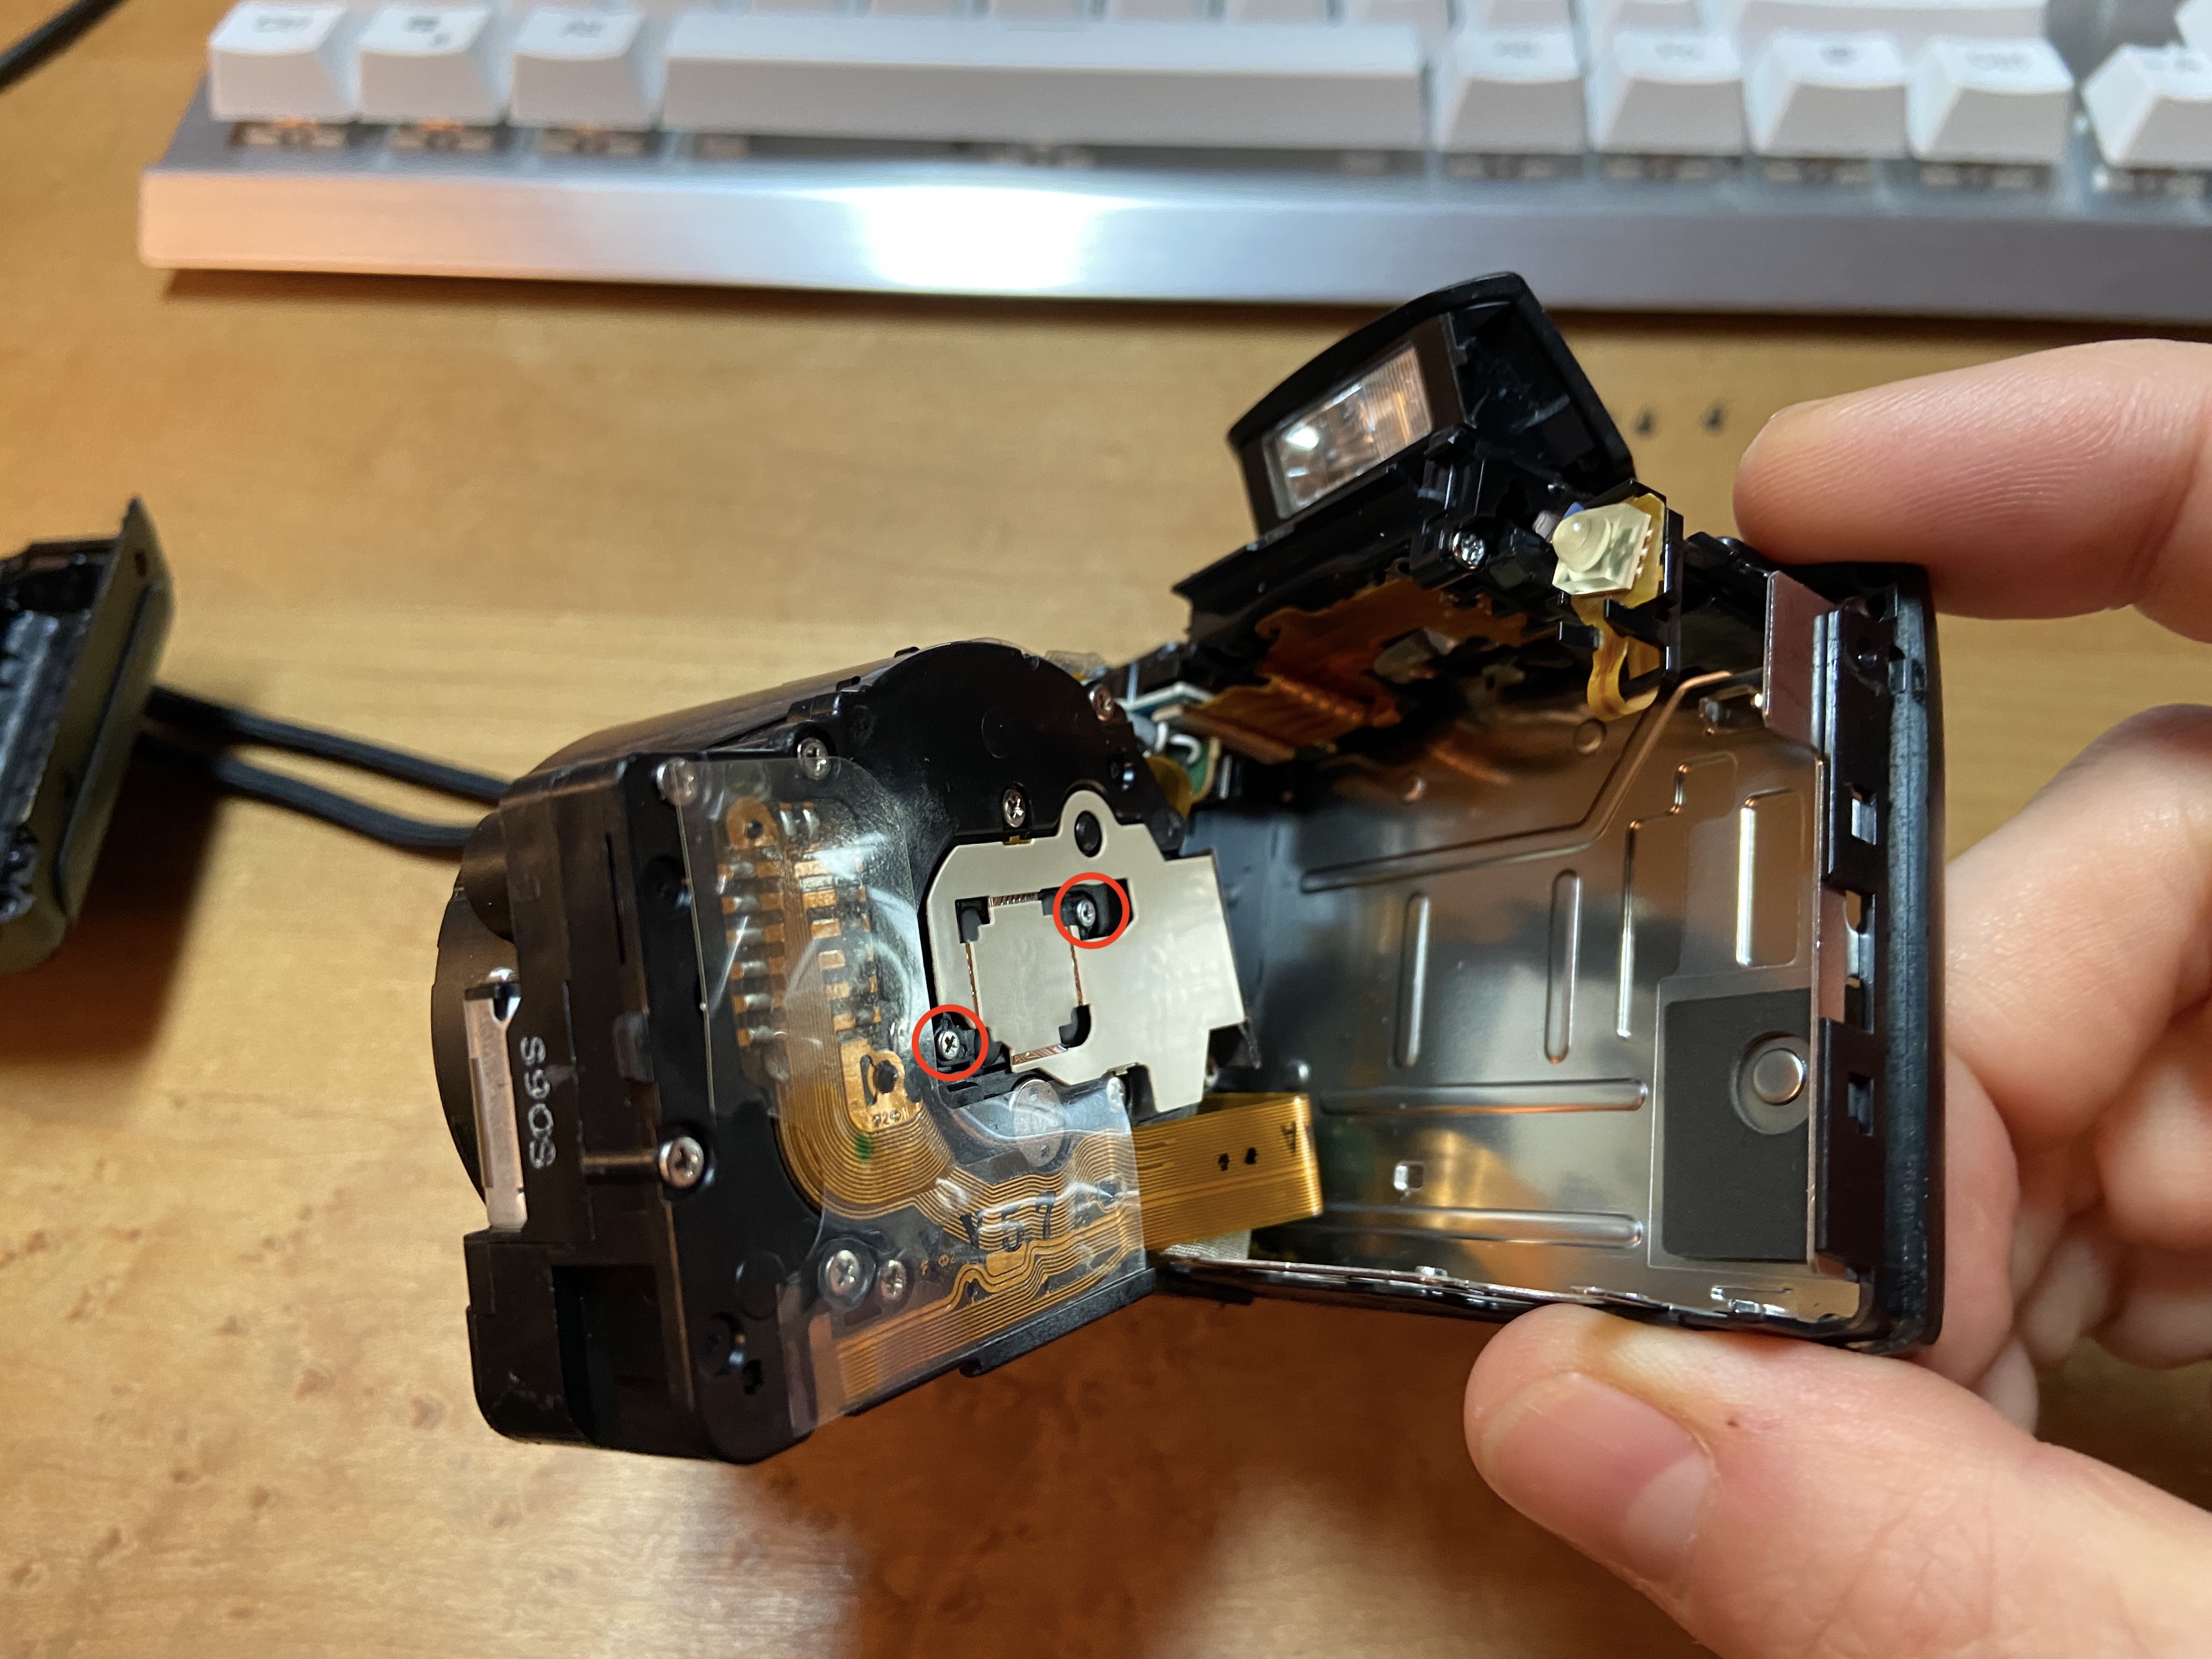
Step 5: Remove the IR filter
After removing two more screws, the IR-cut filter was easy to access. It was not glued and came out much more cleanly than the phone mod.
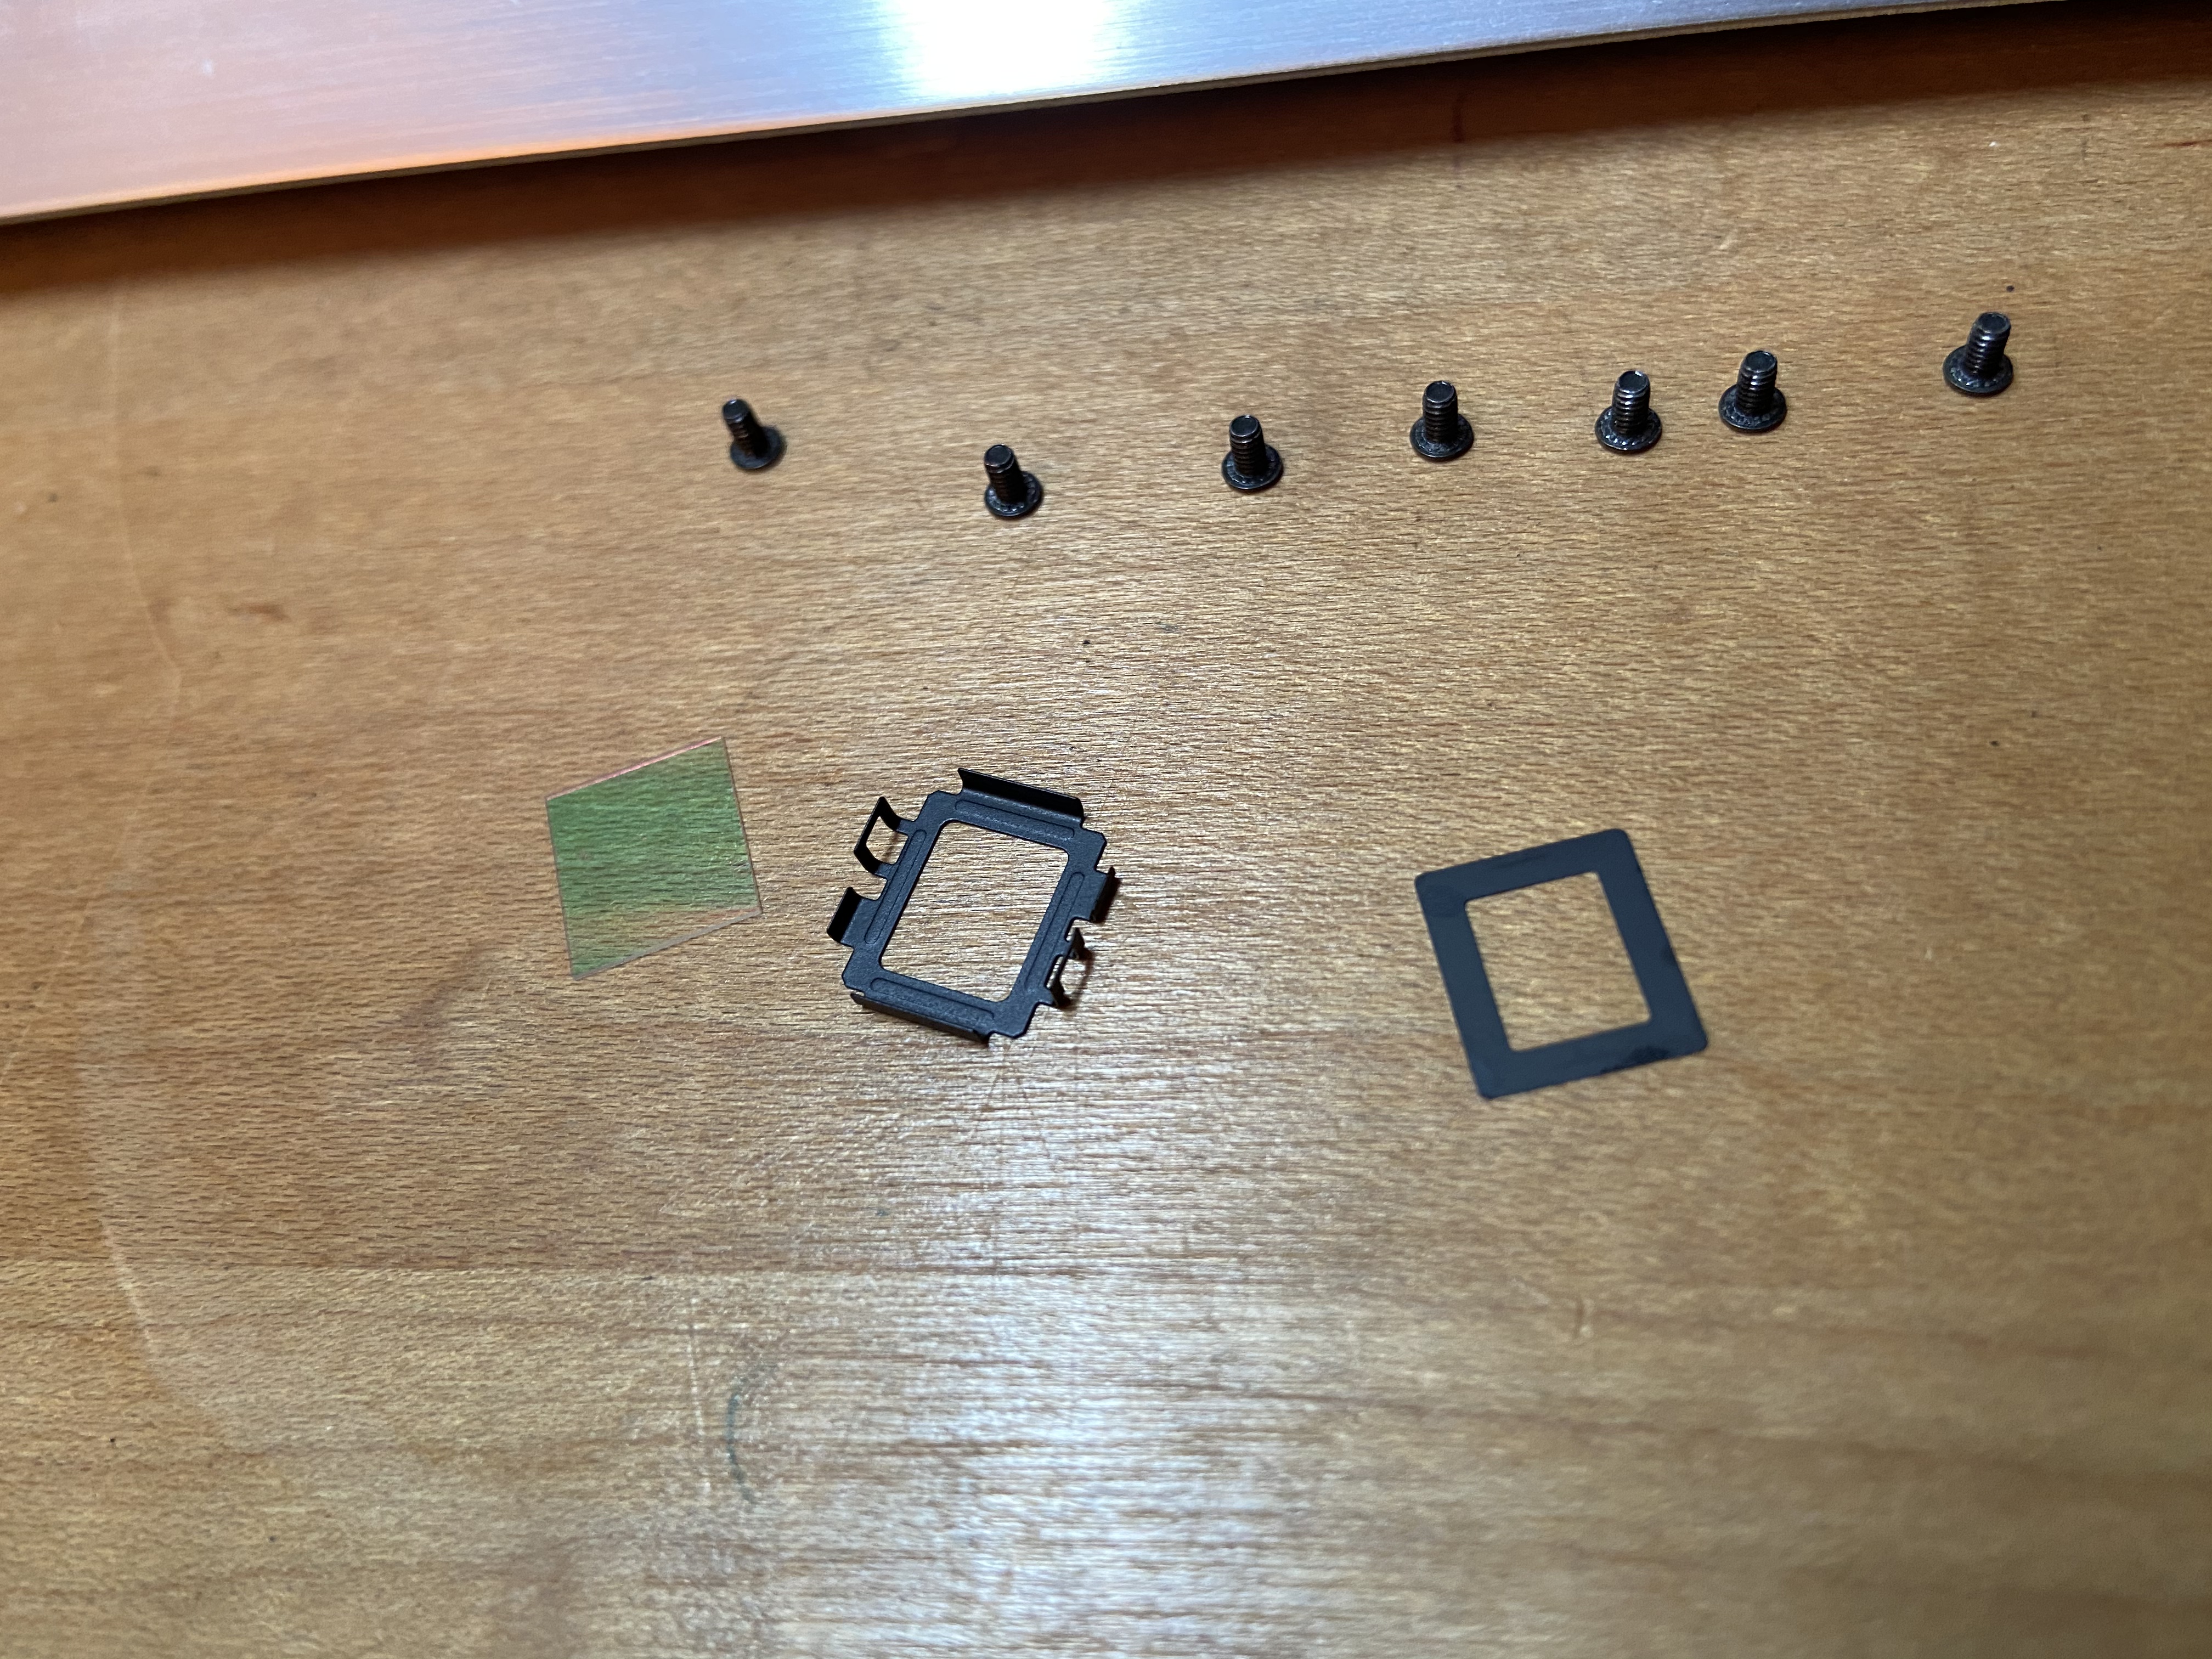
At that point the camera could be left full spectrum or fitted with another filter if I wanted to bias the system toward a different part of the spectrum later.
Sony disassembly record
I kept the build photos because they may be useful to anyone trying something similar on this model.
Sample Sony results
The Sony exported JPEG only, which limited how aggressively I could push the files compared with RAW workflows, but it still produced usable and often attractive infrared images with basic white balancing and Lightroom adjustments.

What this project taught me
This project was a reminder that some of the most useful technical habits develop outside formal work:
- learning quickly from sparse documentation
- reverse-engineering unfamiliar hardware
- tolerating imperfect setups
- iterating toward a working system
- combining physical hacks with software post-processing
- treating side projects as a way to build intuition, not just polished outputs
It also reinforced something I value in my work more broadly: I like projects where the answer is not obvious at the start, where some amount of experimentation is required, and where a rough prototype can teach you a lot quickly.
Safety note
As with any camera or optics experiment: do not point modified cameras or optical paths at the sun, and be mindful around flash capacitors and exposed electronics during teardown.